 Hack this idea. There is no better feeling than to share some of the herbs you produced in the garden with your neighbors. In the process, we are contributing to keeping empty wine bottles out of the landfill as well as making friends happy. By upcycling them into these cute gifts, you are also using your creative skills and enjoying a relaxing time. Materials 6 Empty wine bottles ($0) 1 yard of glitzy ribbon cut in 6 pieces ($1.00) Some gold spray paint ($1.50) Acorns ($0) 5 Sea shells ($0) Glue gun Directions Simply, remove the labels from the bottles, set aside to dry completely and get your creative juices going. WARNING: You will never know how they will look at the end:) HACK: Use any other materials that makes you happy, such as: Pine cones, wine bottle corks, silk flowers, beads, etc. Finally, they can be used as table center pieces during this Holiday Season.
0 Comments
CRAFTY MONDAY- “Acorn Wreath” Another Almost Free Fall Crafty Project Thanks to Mother Nature11/14/2016 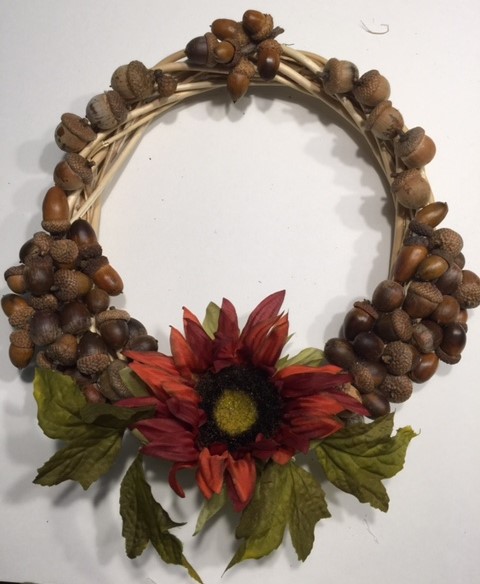 Again, while I was working out during my morning walks, I started to notice an abundance of acorns on the ground. Alright, I get it, this is the fall season. There are so many that I believe the squirrels had enough and are sick of them, smile. To my advantage, I started to collect the nicest that I could possibly find in hopes to be inspired to create something later at home. Acorns, like any natural material, must be cleaned to ensure that no unwelcome mini creature visit your home. So here is what you do:
Materials (Under $2.00) 1 “Dollar Store” Wooded wreath size 12x11 ($1.00) 1 silk flower (.60) Acorns (free) Glue gun Wire cutter 2 inches of wire attached in the back needed to hang it. There are no specific directions for this project, just glue the acorns anywhere you want to create anything that looks good to you, or, follow my slide show for my wreath pattern. Furthermore, you can use any flower of your choice or instead, use a bow, a mini fake pumpkin or mini scarecrow. HACK: Use natural materials as much as possible, they are probably within your property or in the parking lot at work, or in your nearest county park. They are simply beautiful, they challenge and trigger your creativity and artistic skills and the best part is, they and free. 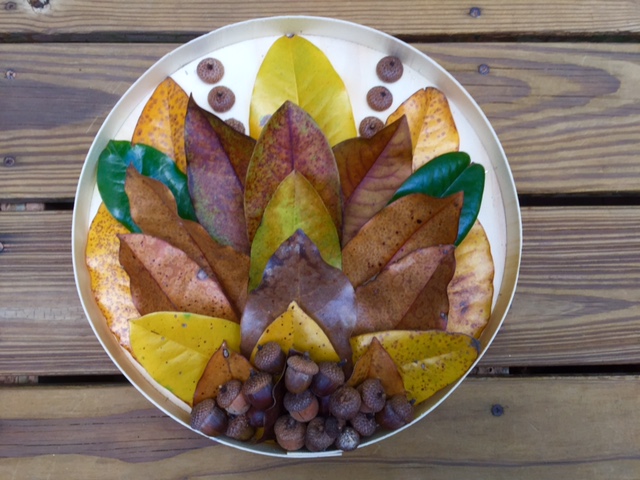 The Hodge-podge of fall colors are so well represented in these Magnolia tree leaves wall arrangement. The leaves turn this pretty after they drop from the tree. This is perhaps one of my favorite trees. The two glossy green leaves that you see in this arrangement, are a good example of the almost year-round color of the Magnolia tree, since it is an evergreen. However, once the leaves mature, they become bright yellow and fall. Once down, the transformation begins and trust me, the colors for your projects won’t disappoint. I just added some acorns to this arrangement to keep up with the fall theme. Come on now, go to your backyard and get crafty today! Materials 1 rounded base (I used a discarded brie cheese container I found at Costco, about 13” in diameter; however, you can use any plate or charger plate or any round base that you may have at home) (free) 15-20 Magnolia tree leaves, the more colors the better. (free) Glue gun Acorns 2 inches of fine twine to glue in the back to hang it Directions Clean all leaves with a wet paper towel and allow them to dry. Glue the tops to the acorns if they are detached** Glue the leaves and acorns in any pattern design that you like. Glue a small piece of twine in the back in order to hang it in the wall. ** (Remember to put the acorns in the oven for 30 minutes at 175 degrees to remove any insects they may have and then let them cool at room temperature before using) |
AuthorI am a blogger, a photographer, a jewelry designer, a gourmet cook, and a recipe book writer. I am also a flea market flipper, an avid gardener, an interior/ outdoors designer, an avid golfer and traveler. Archives
January 2024
Categories |
 RSS Feed