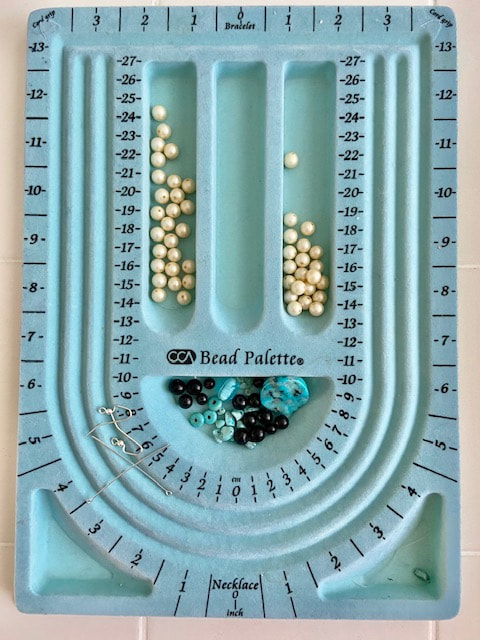
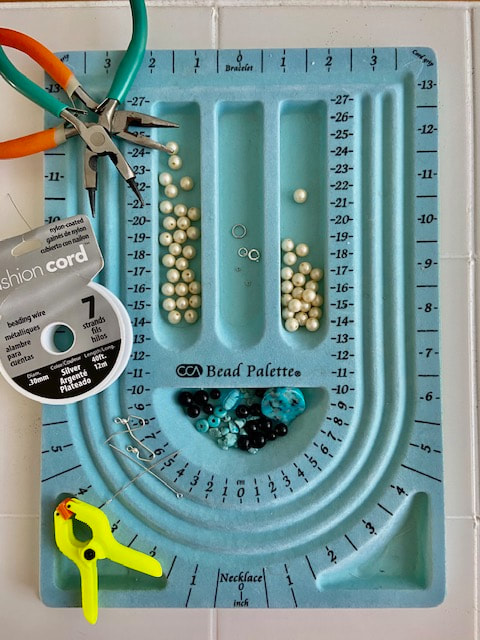
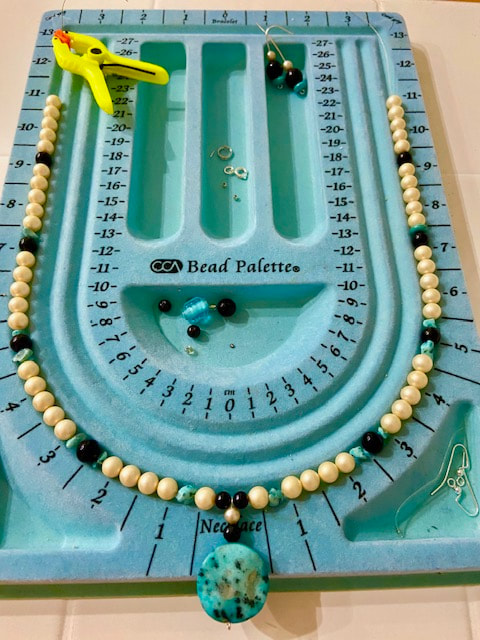
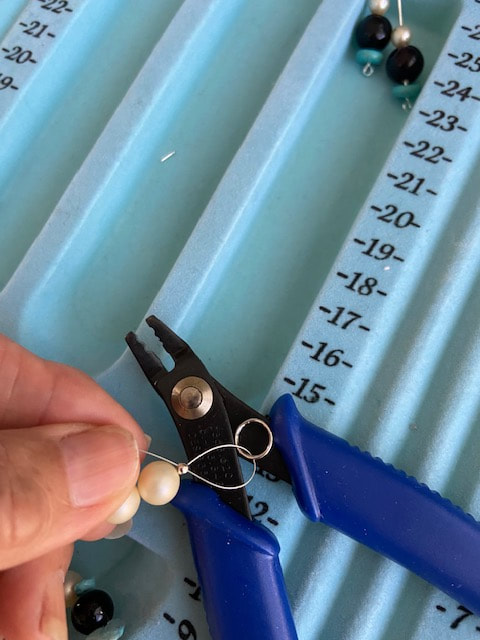
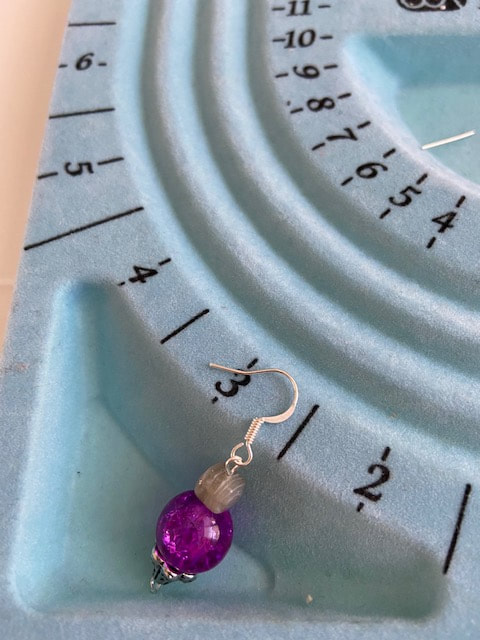
MEMORIES: CRAFTY: MY BROKEN PEARL NECKLACE, REPURPOSED INTO A TOTALLY DIFERENT NECKLACE SET. BOOM!2/15/2021  So, one of my old pearl necklace broke last month while I was shopping. The good news is that I was able to pick up most of the pearls. When I got back home, I just placed them in one of my bead containers and forgot all about them. Then this weekend I remembered them. Therefore, I pulled the container out and decided to make something different with them. I got other containers with leftover beads of different colors and shapes. So, I began the process of looking for color combinations and whatever the heck I was going to do. Finally, it came to me. I came up with a game plan and the result is what you see now, a three color necklace. Not that bad, I am happy.
0 Comments
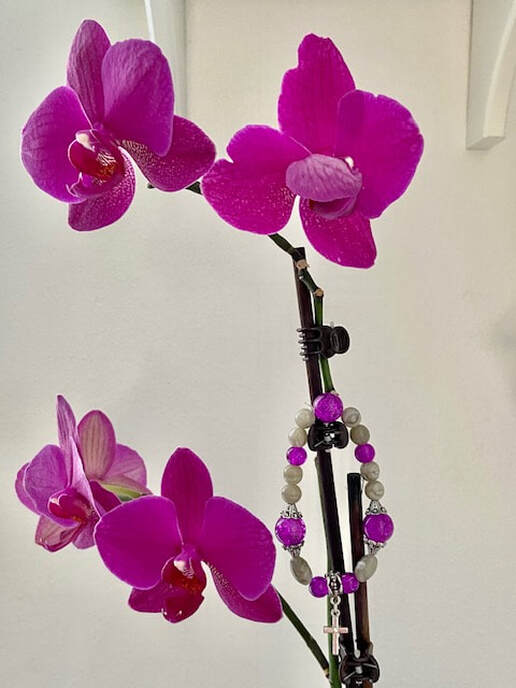 I was at Walmart the other day and while walking by the crafts department, I came across this bag of cute beads. The interesting fact is that they were reduced to .99 cents. Therefore, I couldn’t pass that bargain and decided to purchase them. I got back home and the excitement of what could I do with them began to hit me. I didn’t have the time at that moment, however, I decided that the next day I was going to have some fun brainstorming about what would I make with them. I did. I looked at some of my leftover beads and the final product is done! So, they are ready and in a gift box for a gift for someone special. Who could that be? Smile. And special thanks to Linda for this fabulous orchid plant!  February is a short month and in many states, it is cold, rainy and nasty, a combination that doesn’t give you the motivation to go out unless it is to take the trash. Smile. So, what are we supposed to do for fun when we are overwhelmed with house chores, virtual work and schooling, let alone the pandemic anxieties and fears for our safety, our families and everyone else? Well, we make plans for fun and in writing. I am going to drop few things that you might be interested in adopting so let’s roll, they are not in priority order:
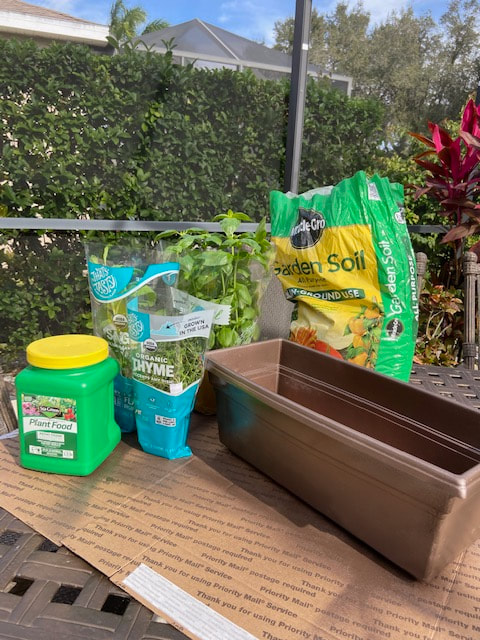
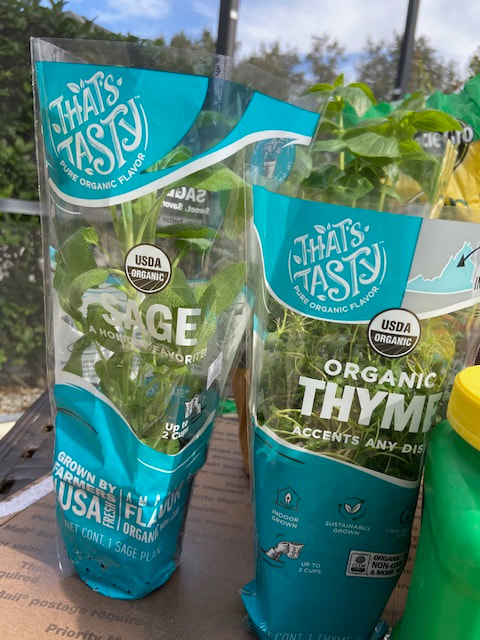
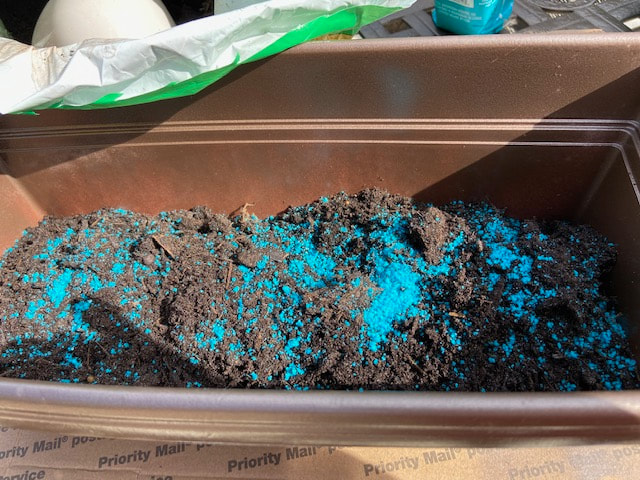
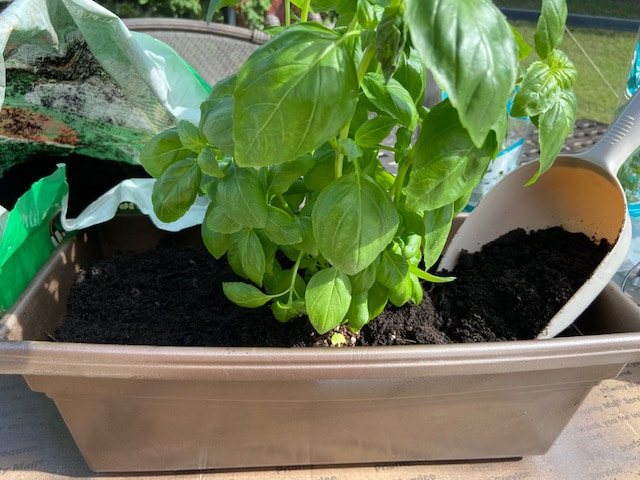
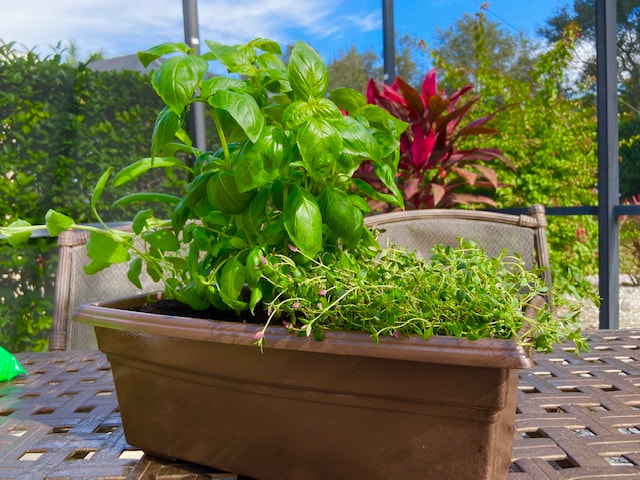
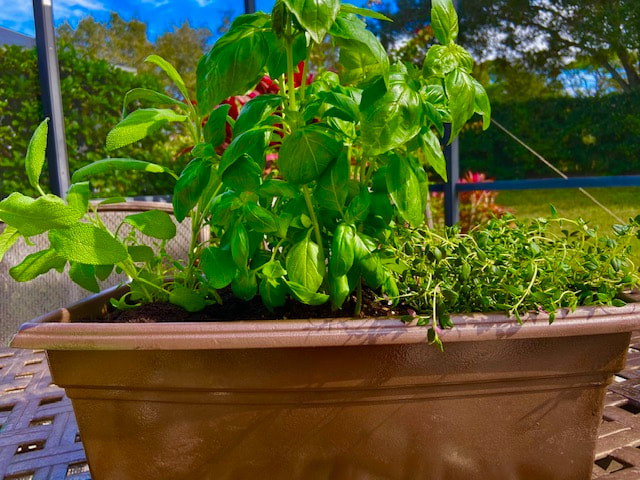
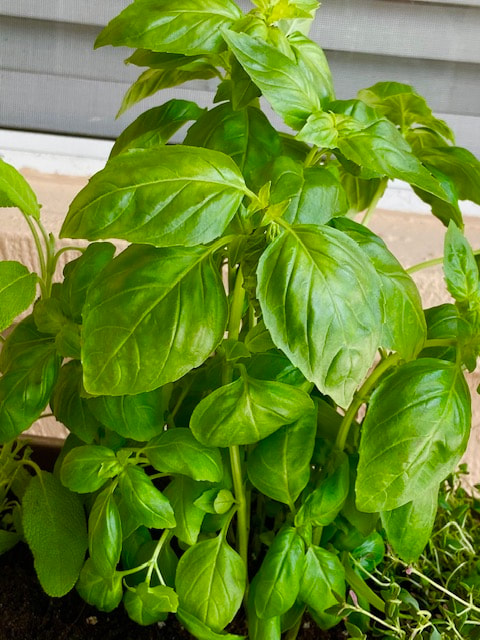
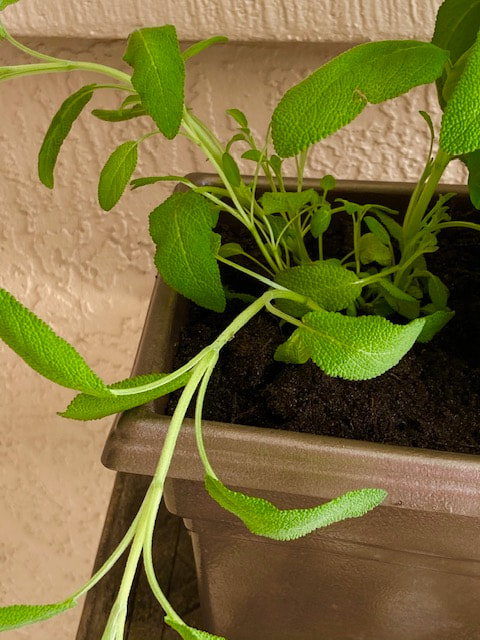
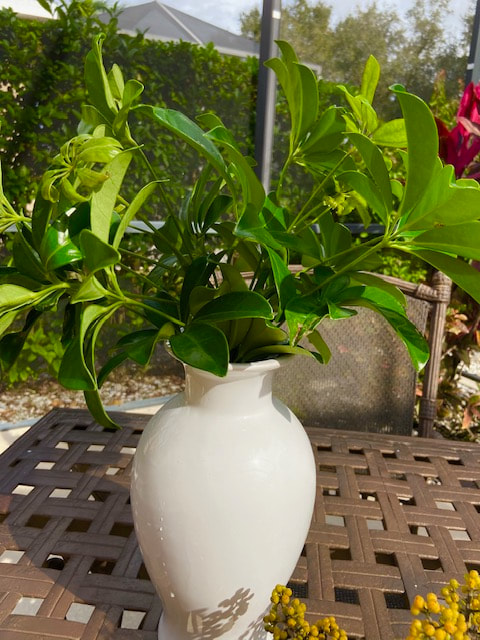
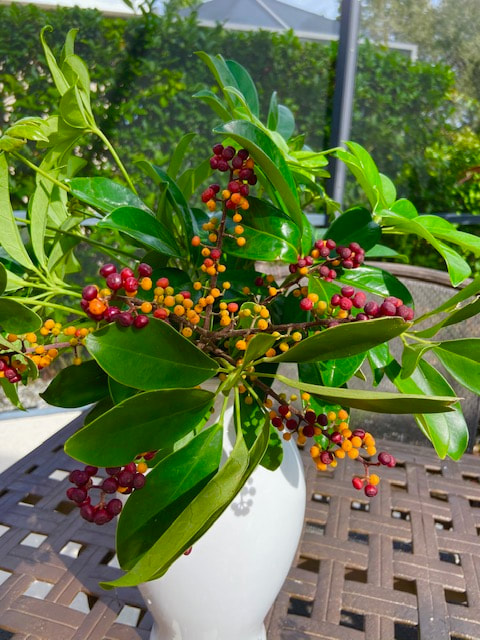
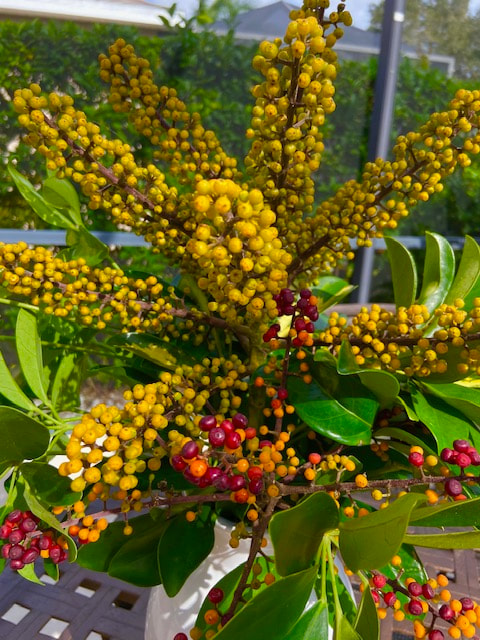
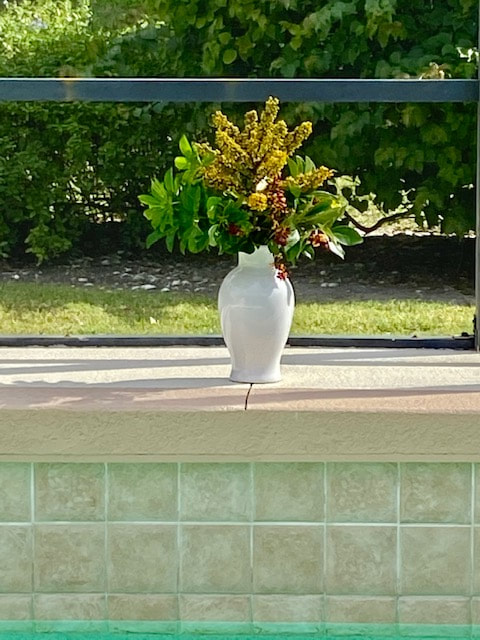
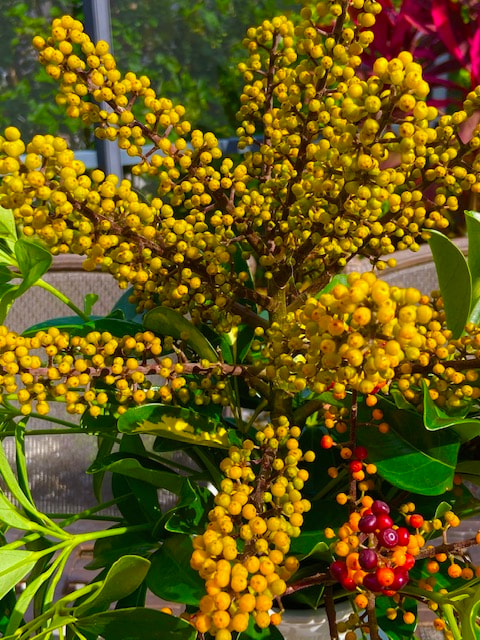
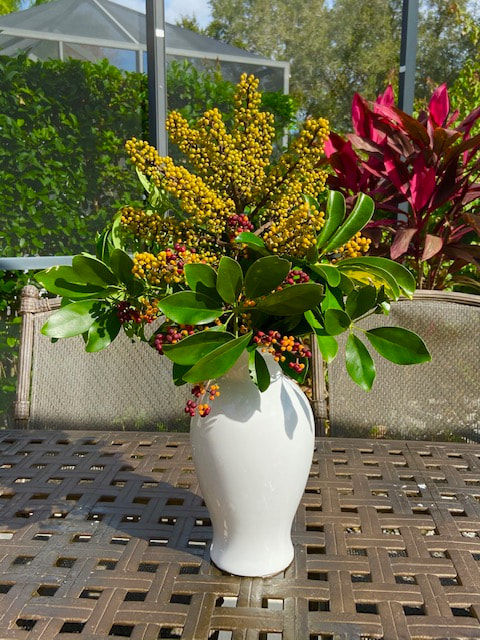
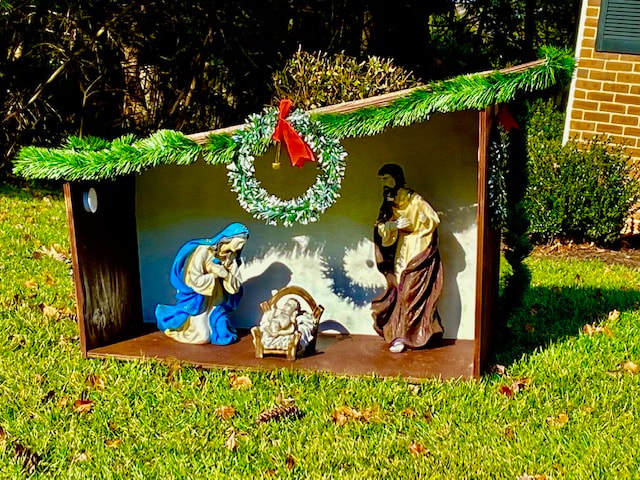
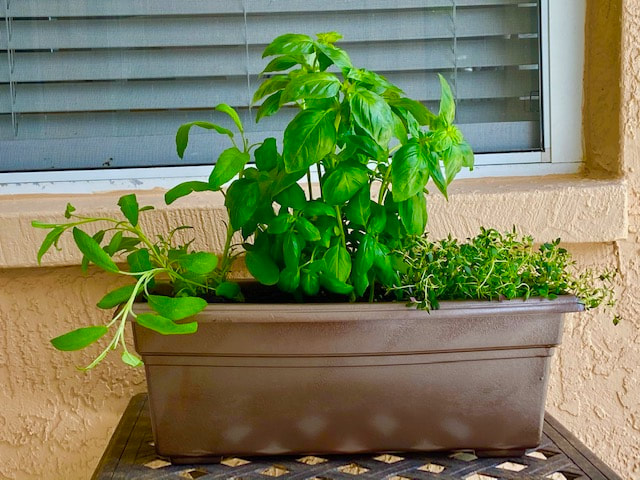 I am sure that somewhere in your garden, shed or garage you have an old, ugly looking planter that just like me, you are saving for whatever unknown reasons in the future. Smile. Well, aren’t we lucky today? I found mine and decided to give it a facelift to grow some needed fresh herbs. It doesn’t take that much time or money to restore it. Just clean it really well, and allow it to dry for at least a day to make sure is totally dry. Then go to the store of your choice and get a can of spray paint, the color that appeals to you. Then just paint the booger, and allow it to dry completely again for one more day before filling it with soil. Finally, if you don’t have seedlings that you started at home from other herbs, just go to your garden center and purchase some of the (ORGANIC) herbs that you like most and BOOM, you will not have to purchase herbs weekly at your grocery store anymore or at least for a while. If it’s wintry outside, then keep the planter indoor in a sunny window location or outdoor if you have good weather. Oh, and don’t forget to water the planter to keep the plants alive. Enjoy your new herbs. 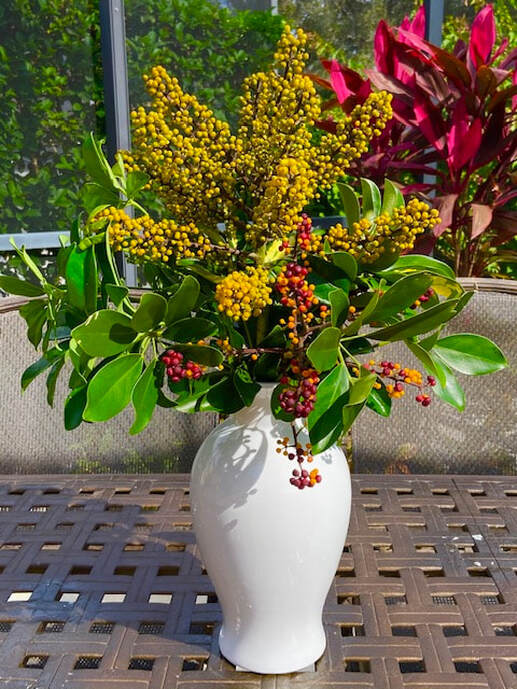 I was walking the other day and suddenly noticed this magnificent tree with some unexpected flower-type that I have never seen before. Since the tree was huge and covered with these flowers, I decided to grab a couple of limbs and see what I could come up with. After I got home, I looked for a plane vase to not compete with the beauty of these limbs. Then, I combined them with other greenery and this was the end result. Friends, it doesn’t take much to create a simple arrangement. Mother Nature is out there and the beauty of all she makes is simply exquisite. There is an abundance of colors, textures, shapes, and dimensions to select. It is simply a matter of capturing what you like most and then become crafty, smile.  Time to get busy creating your holiday set. And yes, I suspect that most of us will celebrate this holiday at home in our family rooms with our immediate family living in our household. However, do you know what? Everything is good. There are two important things that I would like to celebrate big time:
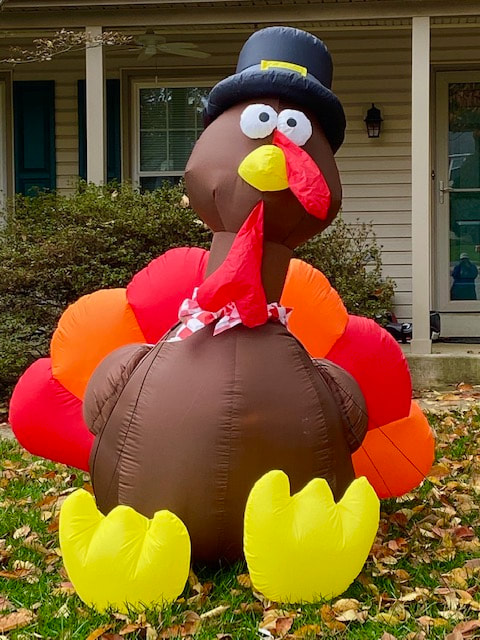
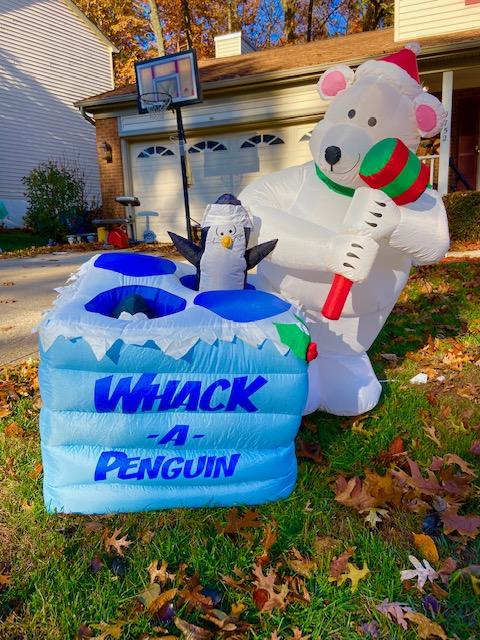
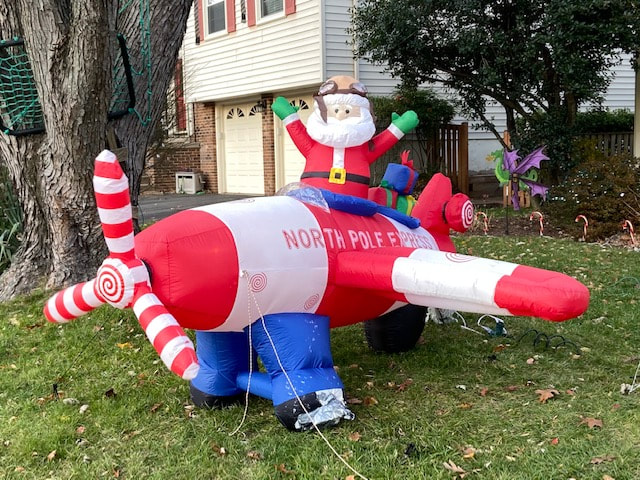
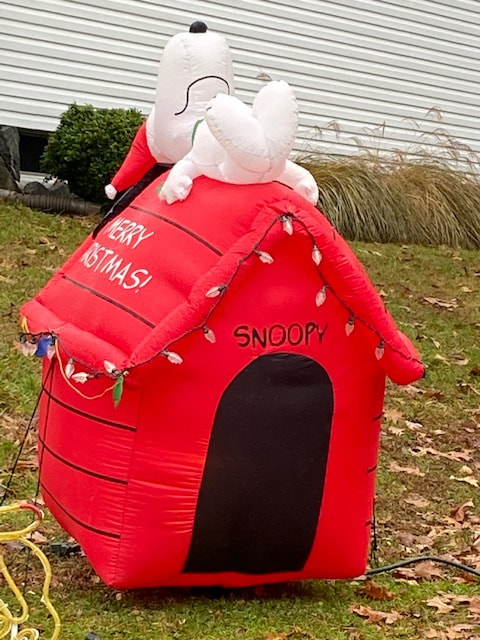
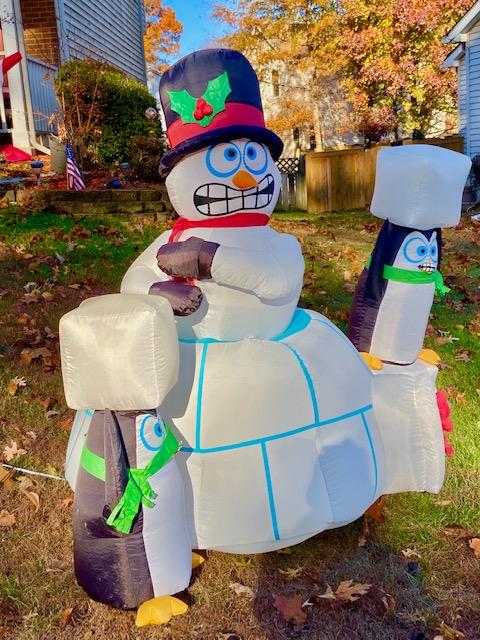
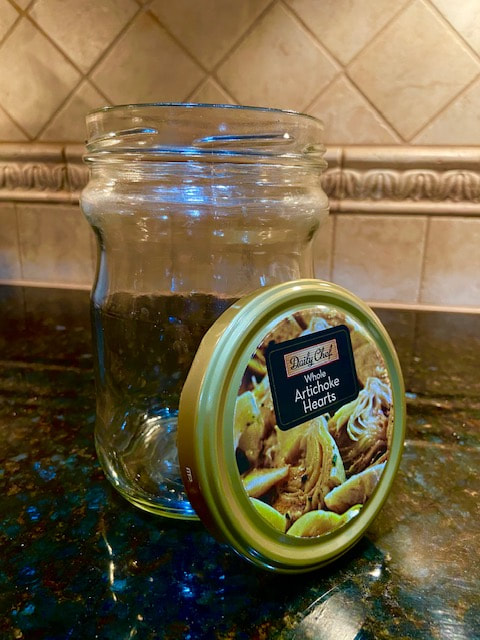
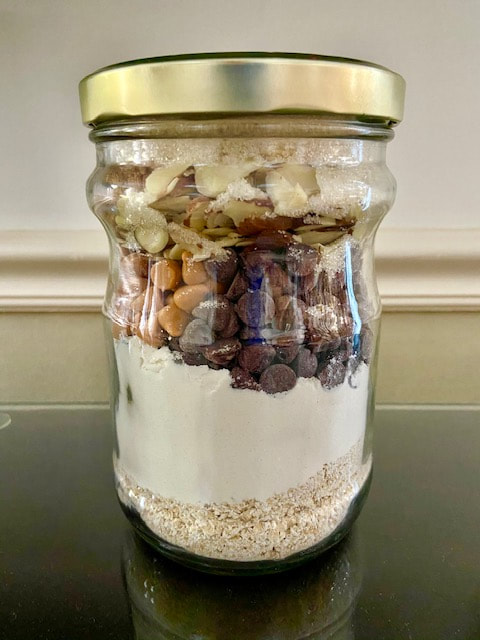
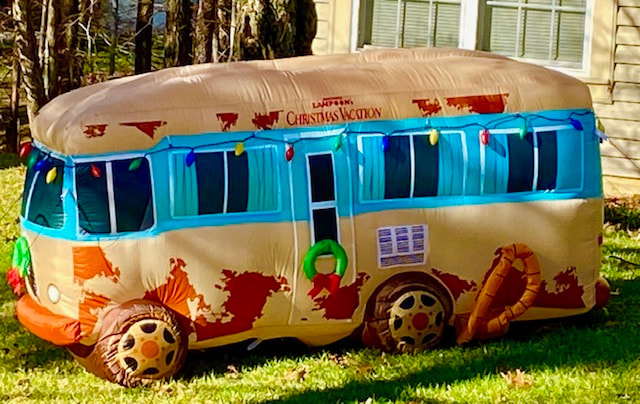
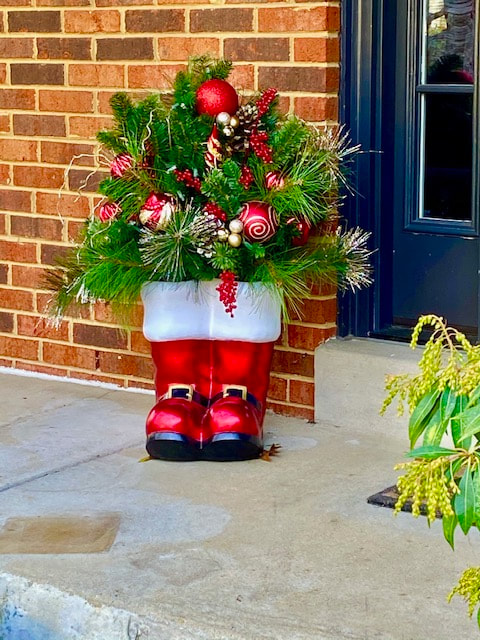
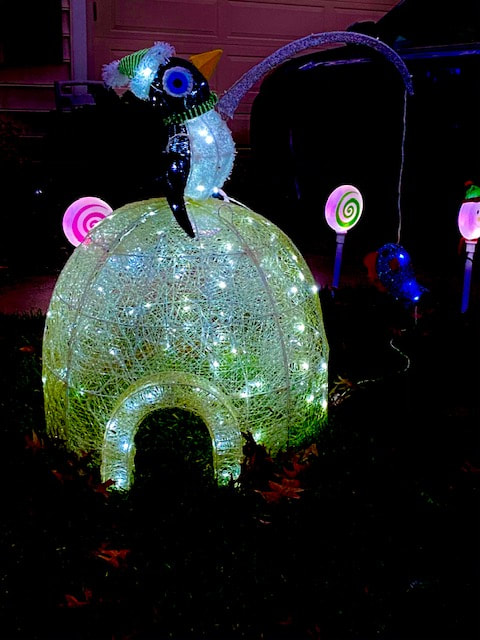
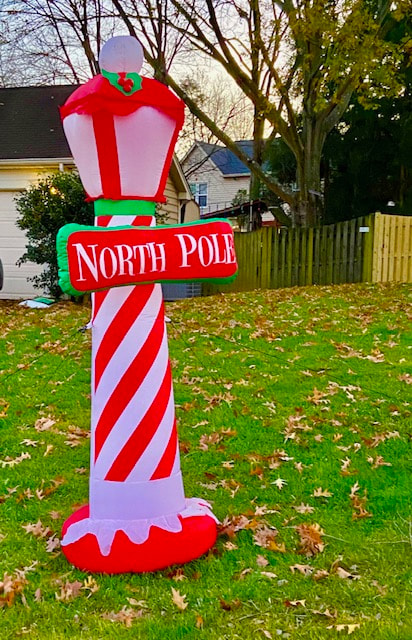
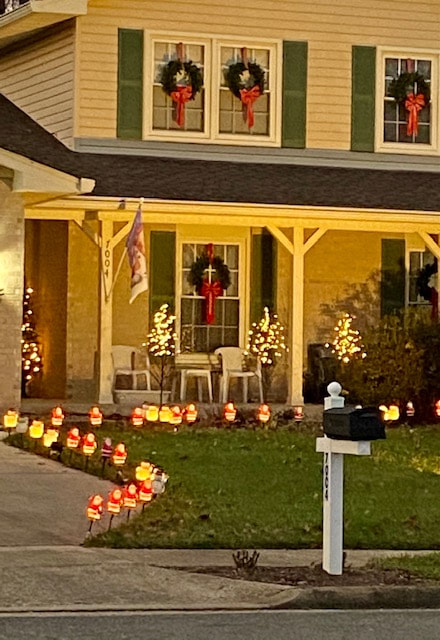
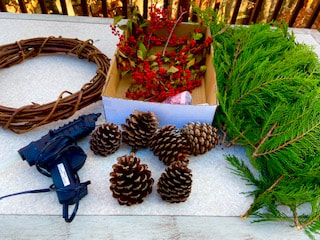
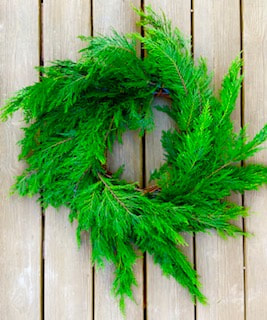
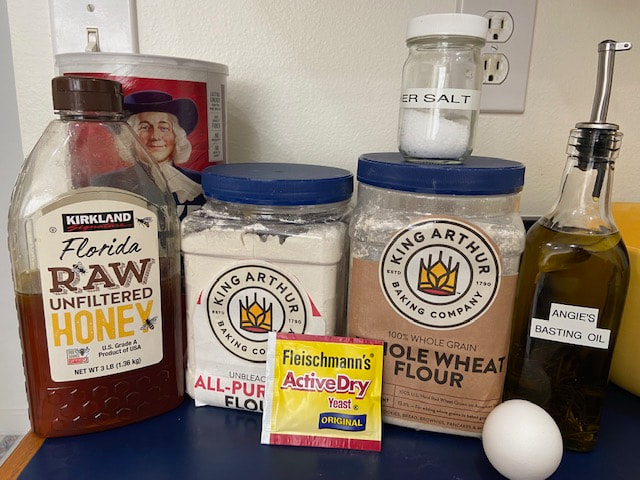
 It is impossible to drive by any street during the holidays and don’t get to see an inflatable. These days they come in all shapes, colors, designs, themes and especially, size. I saw a Santa Claus that was two stories high, huge. Also and unfortunately, in my nearby neighborhood, they posted a home ring doorbell video of a bear wrestling with one. Insane! I don’t have any inflatable, but I thinks that they must be the easiest and fastest way to decorate the front lawn. Here’s the drill: Unpack them, plug them to an extension cord and boom, the holidays spirit is up and running in less than hour, smile. 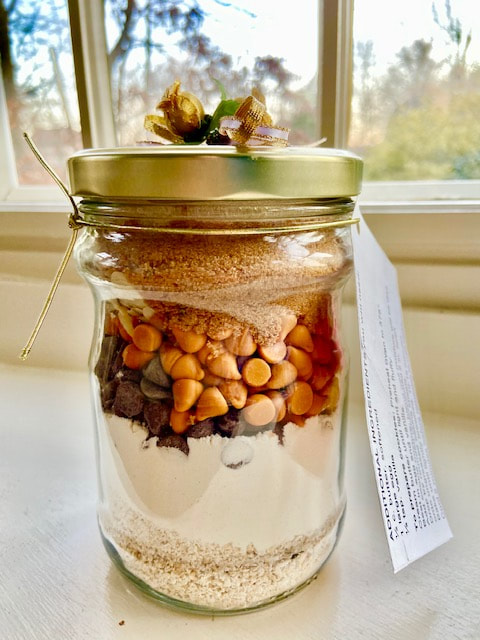 Seriously, it doesn’t take a lot of money or trips to the stores to come up with a homemade gift that whoever you decide to give it to, will appreciate and enjoy. It is also an alternative to a last minute gift that you can put together at home with whatever ingredients that you may have. Just get one of your cookies recipe or bean soup, or just go on-line and get a cookie recipe that you love. Gather the dry ingredients listed. Then hand write or type in a card the wet ingredients that your gift recipient will need to have at home to make the cookies, usually butter, vanilla, egg and or milk. Get one of your repurposed glass jars. Mine was repurposed from a nice looking (and yummy) artichokes jar that I decided to clean well and keep for any future project. The size really matters here friends, so that you can include other extra goodies you may want, such as M&M, white chocolate chips, cranberries, etc. My jar is one quart or the equivalent of 4 cups and yours can be the same or a bit more or less. Then let the fun begin. Get all the ingredients lined up and measured exactly. This will give you an idea of how to combine the layers by the colors. Usually, you will measure and mix the flour, baking soda, baking powder and mix well, that’s one layer, since these ingredients are all white, it doesn’t matter. Then decide on what order you will do your layers and make sure to press gently after each layer before adding the next layer. Decorate the jar with ribbon or cord and also the lid. Handwrite or print the instructions of how to make the cookies and attach to the jar. You don’t need to give the recipe, since you already added all the dry ingredients to the jar, just write the wet ingredients. Done! You’ll make someone happy. Actually, a lot of the people that will eat them too, since the number of ingredients in my container yields 24 regular size cookies, smile. 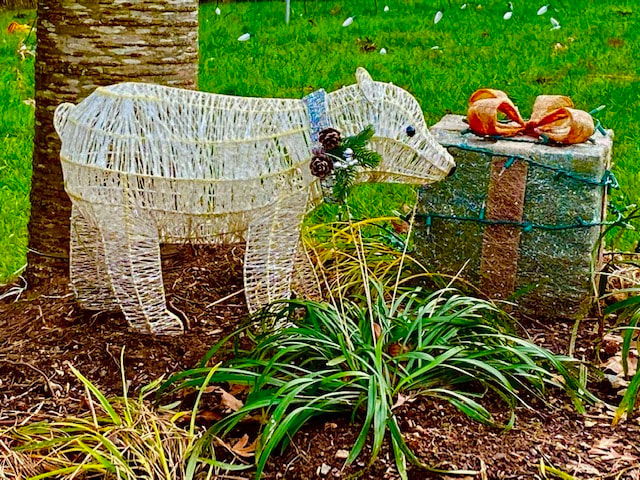 These are, as I call it, “The New Kids on the Block”. Smile. I found these new decorations this year around my neighborhood. Each year they become better and better selecting their pieces, awesome. I cannot thank my neighborhood residents enough for making my day every day. For sure! They decorate their properties with such care and love for everyone to enjoy. Their artistic talents are displayed here for all of us to enjoy. So, what’s your favorite? Thanks Neighbors! CRAFTY: MY GREEN CEDAR TREE BRANCHES with RED BERRIES and PINECONES WREATH FOR ANY FRONT DOOR!12/14/2020 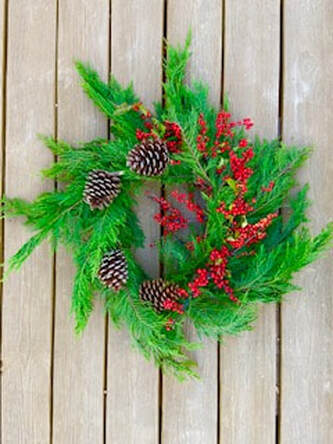 I decided that I need a new wreath for this year. So I began the fun part of thinking shape, colors, decorative picks or berries or pine cones, etc.… I have a lot of Cedar pieces, therefore, they became my first inspiration. Then during my morning walks, I gather a lot of pine cones for the project, got home and baked them at 200 degrees over aluminum foil paper for about 15 to 20 minutes, to kill any pest that found home inside them and allow them to cool. Finally, I went to my craft room and gathered some festive color picks. The fun part was about to begin, smile. This is a simple project. Just stick the twigs through the wooded wreath. Don’t try to be perfect, I like mine all over the place, the way nature is, smile. Once all the Cedar is poked into the wreath, gather some of the berries and pinecones and glue them to the greens. Next, just find a place to hang it and enjoy it. And remember, this is mostly a natural material wreath and is not intended to be put away for next year’s holiday season. Therefore, gather the decorating pieces and discard the greens once it is done for this season. Smile. |
CategoriesABOUT THE AuthorI am a blogger, a photographer, a jewelry designer, a gourmet cook, and a recipe book writer. I am also a flea market flipper, an avid gardener, an interior/ outdoors designer, an avid golfer and traveler. Archives
March 2024
Categories |


 RSS Feed