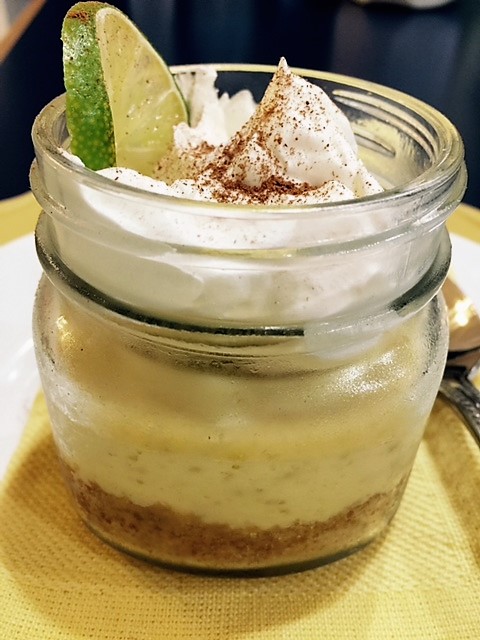
 Nothing says South Florida more than Key Lime Pie. This is a heavenly dessert that is zesty, sweet, tar and yummy. So I jumped into the Mason Jar Dessert train and although I have made Flan in a jar before, I wasn’t sure how this one will turn out. Update: It turned out great! When you eat one, you will experience a hodge-podge of flavors in each and every bite. So, dig in there and spoon out a bit of everything; crust, custard, whipped cream and cinnamon crust, yeah, exactly, run to the kitchen and make one. Bonus: You can control portions by eating just what’s in the jar, plus is adorable to serve them to your guests. Try them soon! Approximate Prep and Cooking Time: 25 to 30 Minutes Approximate Cost: $7.97 or $1.99 per serving Difficulty Level: X Easy ____ Intermediate ____ Advanced Servings: 4- small Mason Jars Ingredients A. The Crust ($4.19) 1 cup graham cracker crumbs (.70) 2 tablespoons granulated sugar (.15) 3 tablespoons unsalted butter, melted (.66) 4 half-pints (8-oz.) mason jars and a baking mold to hold these jars ($2.68) B. The Key Lime Pie Filling ($2.98) 3 egg yolks (save the egg whites for cholesterol free scrambled eggs the next day) (.48) 1 – 14-ounce can of sweetened fat free condensed milk ($1.50) 1/2 cup fresh lime juice (some are not juicy but otherwise you need about 4-5 limes) ($1.00) 2 teaspoons lime zest (0) C. The Topping (.80) 4 tbsp. whipped cream (.50) 4 tsp. Cinnamon to sprinkle over (.15) 4 Lime wedges for garnish (.15) Directions
2 Comments
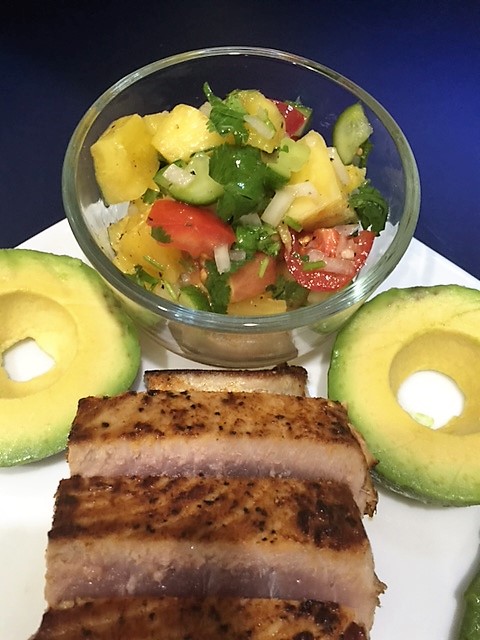 The weekend (and I don’t mean the “singer”) is here and if you are craving for seafood, it may be a good idea to take a deep look at my dish today. In all honesty, this ahi tuna is just accompanying the pineapple salad. This salad is refreshing, salty, tangy, cold and super yummy. The tuna is fresh and after cooked, it only need a squeeze of fresh lime and a pinch of sea salt just seconds before taking that first bite. The dish is a bit expensive but it is so worth it. Approximate Prep and Cooking Time: Under 40 minutes Approximate Cost: $24.30 or $12.15 per serving Difficulty Level: __X _ Easy ____ Intermediate ____ Advanced Servings: 2 Ingredients The Tuna: ($15.85) 2 Ahi tuna fillet (and you will have a small piece left to use in a seafood stew) ($15.25) 1 ½ tsp. Angie’s Dried Seasoning (see link below) (.25) 1 tbsp. EVOO to marinade the tuna) (.35) The Salad: ($4.70) 1 large Roma and 3 cherry tomatoes (.70) ½ Pineapple cut in cubes ($1.50) 4 Baby cucumbers ($1.00) 1 small onion chopped (.30) 1 clove of minced garlic (.05) ¼ cup chopped Cilantro (.25) 1 tbsp. EVOO (1 for the salad) (.35) 1 tsp. Red Wine Vinegar (.15) 1 lime to squeeze the juice over the salad (.25) Salt & Pepper to taste (.15) Garnish: ($3.75) 12 Asparagus spears ($2.50) 1 lime (1 cut in half to garnish) (.25) Avocado cut ($1.00) Directions
My Link: Angie’s Dry Seasonings: http://www.angieslifehacks.com/family-life/oven-roasted-bacon-chicken-and-angies-seasonings  This is such a popular “Fast Food Delicacy” in Puerto Rico. I must say that it can be called the Puerto Rican pizza J, since is a complete meal that you can hold in your hand with a napkin and eat it even as you walk. Like a lot of people, I have my own recipe based on what I like to add, like making my dough from scratch. This time though, I made them with corned beef and Goya disc’s; however, other times I’ve also used chicken, shrimp, fish or any protein that you can think of. I don’t know anyone in the island that don’t like “Empanadillas” but then again, I could be wrong! Are you an Empanadilla/Turnover lover? Approximate Prep and Cooking Time: 1 hour Approximate Cost: $ 11.00 or approximately $1.10 per one Turnover Difficulty Level: Easy __X__ Intermediate ____ Advanced Servings: 10 Part A. Turnover Ingredients 1 pk. Goya 10 dough for turnover discs ($1.71) 1 12 oz. can Corned Beef ($5.14) 1 ½ cups diced harsh browns potatoes (.95) 4 hardboiled eggs cut in slices or wedges (.64) 2 tbsp. Tomato sauce (.15) ½ tsp. Oregano (.15) ½ tsp. Paprika (.15) 2 tbsp. Sofrito (.35) 1 tbsp. olive oil (.35) 1 ½ tbsp. Capers and salad olives, drained and rinsed (.25) 1 tbsp. Sliced pimentos (.15) 1 tbsp. water 1 ½ cups of peanut oil to deep fry the turnovers. ($1.00) Part B: Sofrito/Molido render 1 cup = ($.96) ½ large onion chopped (.20) 5 cloves garlic (.30) 1 handful of Cilantro, chopped (.30) ½ tbsp. olive oil (.16) Directions to Prepare Sofrito/Molido In a small food processor or blender, blend all the ingredients listed in Part B. Refrigerate to use in soups and stews at a later time. Directions to Prepare Turnover/Empanadillas Add the corned beef to a skillet on med-low, break it into pieces, just like when browning ground beef. Let it cook until is soft. Add the Sofrito, hash brown, tomato sauce, oregano, paprika, capers, olives and water. Cook for about 10 minutes until the ingredients blend well. Turn off, let it cool down. Directions to Assemble the Turnover/Empanadillas Defrost the Goya dough disks. Sprinkle a tsp. of flour on your counter top and place and spread dough out slightly with a roller. Place 1 tbsp. of your corned beef filling in the center of the disc, top it with a slice of hardboiled egg, pimento and olive. Before turning the dough over to form a half moon, using a small brush or your finger, rub water around the whole edge, this serve as glue, and then fold it. Using a fork, press the edge firmly to seal both sides evenly. Deep fry in medium heat oil until they look golden brownish. Serve alone or with avocado and a beer to wash it down.  Since you already have the recipes for the basic chocolate cake and frosting that I posted last week, I decided to go a step further and give you some simple cake decorating ideas. You can implement any of these patterns each time that you make a chocolate cake. If you decide to serve it with some serious ice cream on top, it will taste even better, smile. Ingredients that you can use to decorate your one-pan chocolate layer cake(s) 1 round or Bundt chocolate cake, filled with frosting, then spread remaining filling over. 12 Strawberries (approx.) cut in half or; 1 cup of M&M candy or; 15-25 (approx.) Chocolate covered almonds or; Powdered sugar or; Sprinkles Directions There are many ways to decorate your cake.
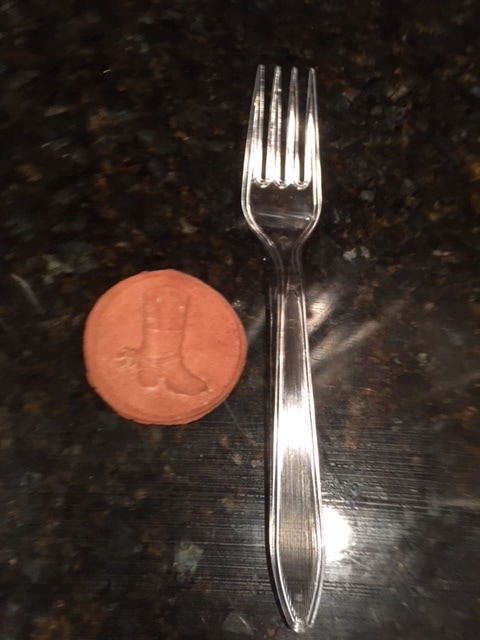 Brown sugar solid rock? I know the frustration when you are about to make a recipe that requires brown sugar. You go to the pantry and find it hard as a rock. No problem now, you have few options: 1. The first rule is to keep your brown sugar in an air tight plastic bag or container. 2. Second; while in Denver, Colorado, I went to a local grocery market an uncovered that they have in stock a small terracotta item about the size of a quarter, that when dropped inside your brown sugar container, it will keep the sugar flowing for months. They are called Brown Sugar Preserver and you can Google it to purchase one or more. Real cheap, under $5. 3. Finally, other option is to soak a piece of paper towel and put it inside the tight plastic bag for a day or two. Genius, no more waste. 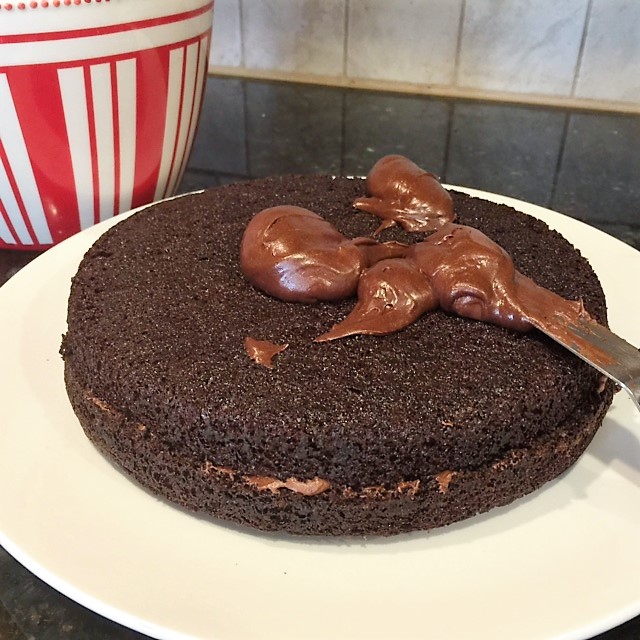 Again, if you want a simple easy does it frosting, this recipe will make you happy. The good news, it’s also in the back of your Hershey’s Cocoa container. The key to make a smooth frosting is to have your butter at room temperature, real soft, but with this recipe, no problem, just melt it in the microwave. It takes no time to make this recipe. However, you will have to be very discipline by not liking the bowl after your cake decoration is done. Good luck with that! Approximate Prep and Cooking Time: Approximate Cost for (2) – 9’- round baking molds: ($5.58) Servings: Approximately 2 cups for a cake that could serve 10 Difficulty Level: X Easy ____ Intermediate ____ Advanced Ingredients 2/3 cups Hershey’s Cocoa ($1.80) 1/3 cup Evaporated milk (.33) 3 cups Powdered sugar ($1.25) 1 stick of unsalted butter – melted ($1.25) 1 tbsp. Pure Vanilla (.95) Directions
 Nothing is more important than to have a good chocolate cake recipe in hand whenever you want to bake a chocolate cake. I had my own recipe until so many years ago, when as I was watching TV I saw Martha Stewart dumping a cup of boiling water into her cake batter. I went like, has she lost her mind???? Then she said, rather quickly, “don’t fret, I am using the Hershey’s Cocoa recipe that comes in the back of their cocoa powder container”. I was still skeptical; however, after I tested it, I threw my recipe out and this is what I have been using ever since. Super chocolaty, creamy and moist. So, get your Hershey’s Natural Unsweetened Cocoa Powder container, look up the recipe in the back and make a delicious, super moist chocolate cake. The photos in my slide presentation shows you the ingredients that I used, as well as the steps and how the cake looks from starting the batter to final. Tomorrow, I’ll give you the ingredients and steps to a creamy chocolate frosting and later this week, we will move into basic simple ways to decorate your chocolate cake at home. Remember, these are not professionally made cakes, they are simple to make and decorate by you, for you and your family, they will love you forever!  Rules to go by: If I am making one of my cakes or a recipe that I read somewhere and liked, this is what I do:
These are the simple rules I learned that helped me time and time again to bake delicious cakes. They have not taken the fun of baking away from me. In fact, these rules ensure me that I will not have cake problems I shouldn’t be having. I hope they help you as well. TOMORROW, CHOCOLATE CAKES! Have fun Baking friends! 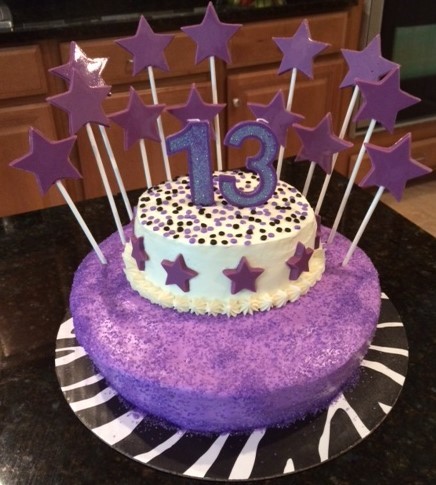 By the way, these aren’t my cakes, they are my twin daughters Neshy Bravin and Suzy Fuerst creations. Neshy’s is the 13th birthday cake and Suzy’s, also a birthday cake, is s’mores inspired. So proud of them. You know; like mother like daughters, smile! Oh, one more thing, my son is not too far from the tree either, he has other cuisine specialties that I’ll share with you at a later time. So proud of them! A little history..... Many years ago I went to baking school to learn how to make wedding cakes. I was an at home mom and wanted to earn an income. I learned a lot and consequently, I was also successful in establishing a home business, selling lots of wedding and birthday cakes. Before joining baking school I had been a home baker for a while, so I thought I knew it all. However, I was up for a huge surprise. At baking school, I learned (and I have never forgotten), that baking is technically a science. Even though I love baking and enjoy every minute of it, I am meticulous each time I bake; and it’s the only time that I am not creative in my kitchen. TOMORROW, UNDER “CAKES WEEK- PART 2 BASIC RULES TO FOLLOW”, I’LL TELL YOU WHAT I RELIGIOUSLY DO EACH TIME I BAKE.  Let’s close the Soup/Stew Week with one of my crazy recipes, including some of my unusual ingredients to cut corners. Is about time to give turkey another chance after thanksgiving. Ground turkey is so healthy. This pack was 99% fat free, and the meatballs cooked fast. I replaced animal fat with extra virgin olive oil; is healthier and tastes much better. Let’s start cooking! Approximate Prep and Cooking Time: 30 Minutes Approximate Cost: $7.14 or $1.79 per serving Difficulty Level: X Easy ____ Intermediate ____ Advanced Servings: 4 Ingredients ½ lb. ground turkey breast (@$3.99/lb.) = $1.99 ¼ cup Parmesan cheese (.75) 2 tbsp. Dried Minced Onions (.50) 1 tbsp. Chimichurri flakes (or any dried herb you may have in the pantry) (.30) 1 ½ tbsp. Goya EVOO (1/2 to add to the meatballs and 1 to sauté them into) (.40) 2 cups of my chicken stock** (.80) 1 ½ cup of frozen diced Hash Brown potatoes (.90) 1 ½ cups parboiled rice ($1.00) 2 Sazón envelopes (1 for the meatballs and 1 for the yellow rice) (.50) Salt & pepper to taste ** Remember, my stock is pack of flavor but no salt added to compete with your ingredients. Directions
Enjoy! |
ABOUT THE AuthorI am a blogger, a photographer, a jewelry designer, a gourmet cook, and a recipe book writer. I am also a flea market flipper, an avid gardener, an interior/ outdoors designer, an avid golfer and traveler. Categories |
 RSS Feed