|
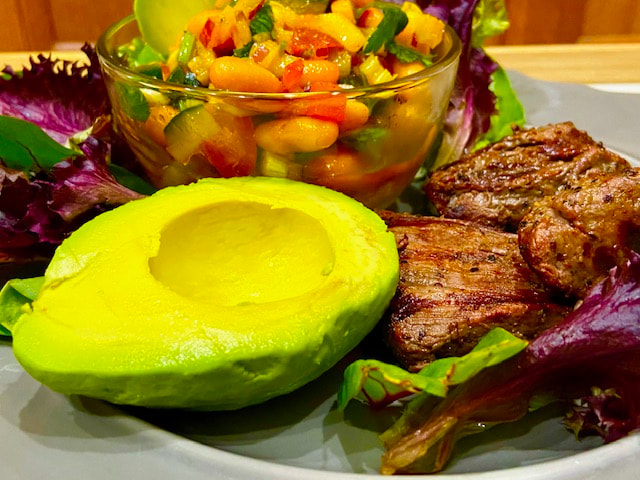
I think that you will like this combination, my yesterday’s cannellini beans salad with today’s BBQ filet mignon. Just try it and you will find yourself making it over and over, smile. Category: Entrée Approx. Prep and Cook Time: under 40 minutes Approximate Cost: $16.75 or about $8.38 per serving Difficulty Level: Easy Allergens, Other: Gluten Free (and of course, the bean salad is vegetarian and a stand-alone meal) Servings: 2+ Ingredients 1 lb. filet mignon cut into 5 pieces and thickness to your taste to BBQ them ($14.50) ¼ c. Angie’s basting olive oil (.70) 1 tbsp. Angie’s dry seasoning (or the seasoning of your choice) (.20) 1 tsp. fresh grind pepper (.10) 1 avocado ($1.25) (Plus, yesterday’s cannellini beans salad recipe) Directions Season the filets with my dry seasoning, black pepper and my basting oil. Refrigerate for at least 1 hour. Start to BBQ them to your taste; med-well, well done, etc. When you are ready, bring your Cannellini beans salad out , slice the avocado and start plating once the filets are done. My Links: Angie’s Dry Seasonings: http://www.angieslifehacks.com/family-life/oven-roasted-bacon-chicken-and-angies-seasonings Angie’s Basting Oil: www.angieslifehacks.com/cuisine/the-flavor-series-recipe-2-angies-basting-olive-oil
1 Comment
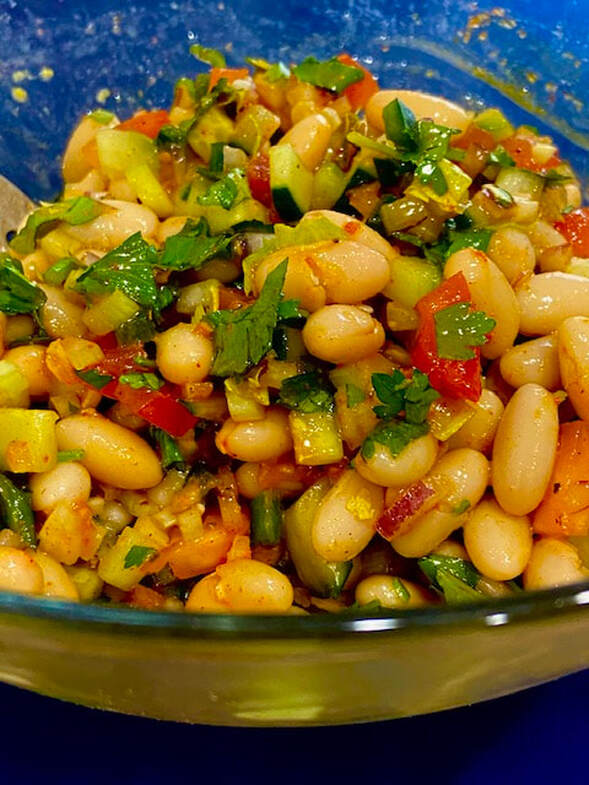
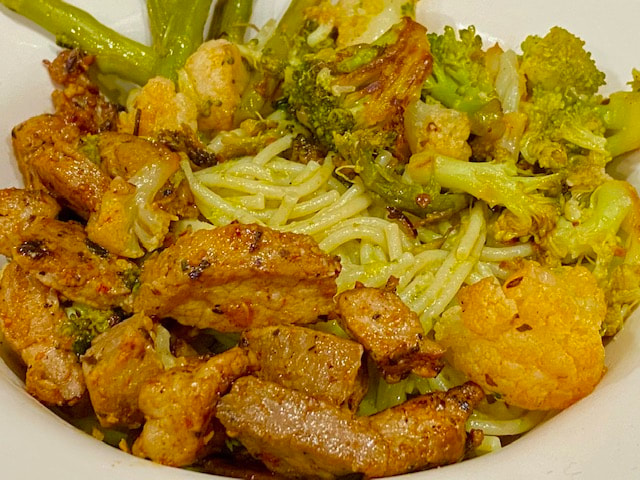
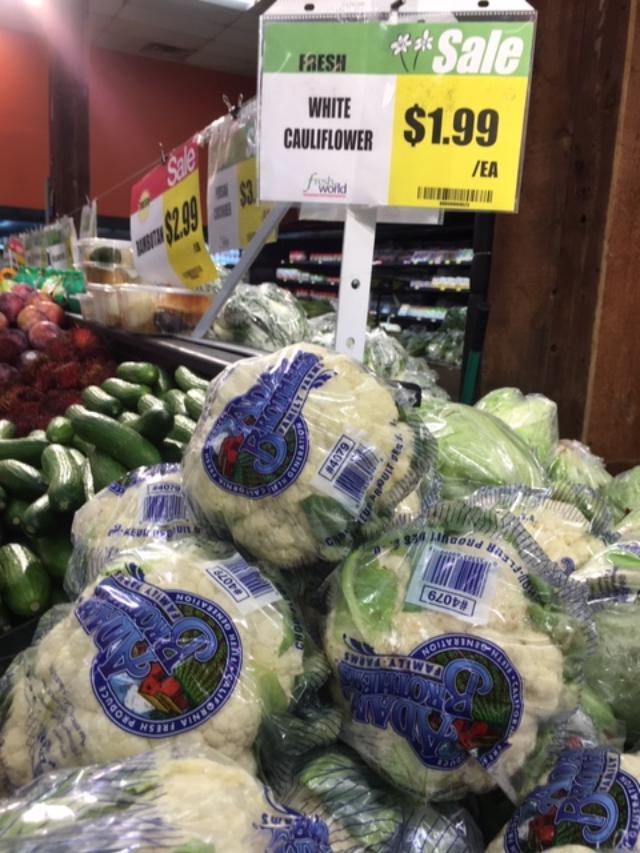
Protein plus Protein equals good stuff to feed our bodies. I decided to use these beans in a salad today, simply because I had them in my pantry and I didn’t want to stew them to use in a “rice and beans” meal, smile. Tomorrow, BBQ Filet Mignon with this beans salad. Boom! Category: SIDE DISH Approx. Prep and Cook Time: 15 Minutes Approximate Cost: $4.65 or $2.33 per serving Difficulty Level: Easy Allergens, Other: Gluten Free _X_ Vegetarian _X_ Servings: 2 to 3 Ingredients 1 can 15oz. cannellini beans, drained, rinsed, drained again ($1.30) ½ Poblano pepper, rinsed, seeded and chopped (.10) 1 med size tomato, rinsed and chopped (.30) 2 Celery stalks, rinsed and chopped (.20) 1 handful of Cilantro, rinsed and chopped (.20) ¼ c. Italian parsley, rinsed and chopped (.20) ½ small red onion, chopped (.30) ½ large Cucumber, rinsed and chopped (.50) 1 garlic, minced, (10) 2 ½ tbsp. Angie’s basting olive oil (.70) 1 tsp. Angie’s dry seasoning (or to-taste) (.25) 1 Lemon for the juice (.50) Directions Prepare all the ingredients, meaning, rinse, pat dry, chop, rinse and drain the beans, etc. Add them to a non-reactive bowl. For the salad dressing, whisk together either in a blender or by hand, the basting olive oil, my dry seasoning and the juice of 1 lemon until the mix is emulsified. Pour it over the beans and veggies that you have in the bowl, mix well and refrigerate for at least 10 minutes. Done. My Links: Angie’s Dry Seasonings: http://www.angieslifehacks.com/family-life/oven-roasted-bacon-chicken-and-angies-seasonings Angie’s Basting Olive Oil: www.angieslifehacks.com/cuisine/the-flavor-series-recipe-2-angies-basting-olive-oil While at the grocery store, I found this new product; Ronzoni Cauliflower Spaghetti. Well heck yes, I bought it to test it. I decided to make it in a pesto sauce. Overall, I was pleasantly surprised at how good and healthy is this new cauliflower spaghetti. You should try it. Category: Entrée Approx. Prep and Cook Time: under 30 Minutes Approximate Cost: $12.44 or $4.15 per serving Difficulty Level: Easy Allergens, Other: Gluten Free Servings: 3 Ingredients 1 box of Cauliflower spaghetti ($2.99) 1med-size pork tenderloin, cleaned and cut in bite pieces ($2.75) 2 tbsp. Angie’s basting olive oil (.70) 2 tsp. Angie’s dry seasoning (.35) 1 c. Cauliflower florets (.90) 10 Asparagus ($1.50) 1 c. Broccoli ($1.00) 1 avocado ($1.25) 2 to 3 tbsp. of pesto (homemade of purchased) ($1.00) Directions Clean, dice and season the pork tenderloin. Refrigerate. Clean and cut all the broccoli, cauliflower florets and asparagus. Steam briefly until somewhat tender but with a bite to it. Drain. Sauté the tenderloin until golden brown and 100% cooked. Cook the cauliflower spaghetti according to the box directions, drain, add the pesto, stir. Remove the tenderloin bites from the skillet and add all the veggies to the skillet to brown lightly and get the skillet leftover tenderloin flavors. Slice the avocado and you are ready to plate this meal. Enjoy! My Links: Angie's Pesto: http://www.angieslifehacks.com/cuisine/angies-homemade-basil-pesto-sauce Angie’s Dry Seasonings: http://www.angieslifehacks.com/family-life/oven-roasted-bacon-chicken-and-angies-seasonings Angie’s Basting Olive Oil: www.angieslifehacks.com/cuisine/the-flavor-series-recipe-2-angies-basting-olive-oil Someone told me that the cauliflower season is from January to March. I had no idea, since I always find cauliflower year-round. So, I now focus my purchases of this fantastic veggie during these months because I think that the product will be of higher quality and flavor.
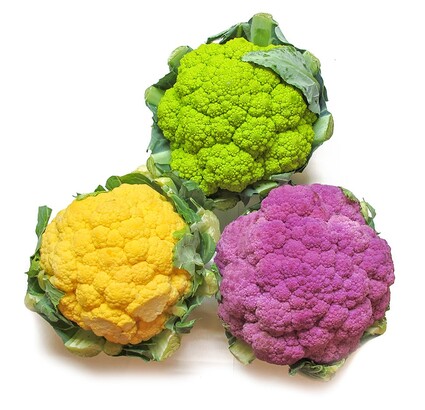
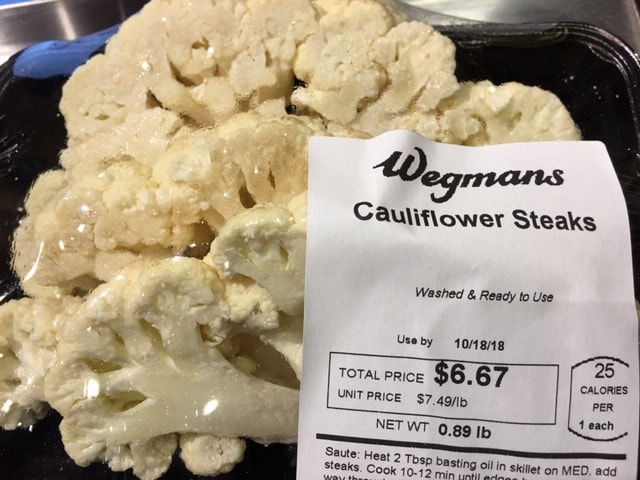
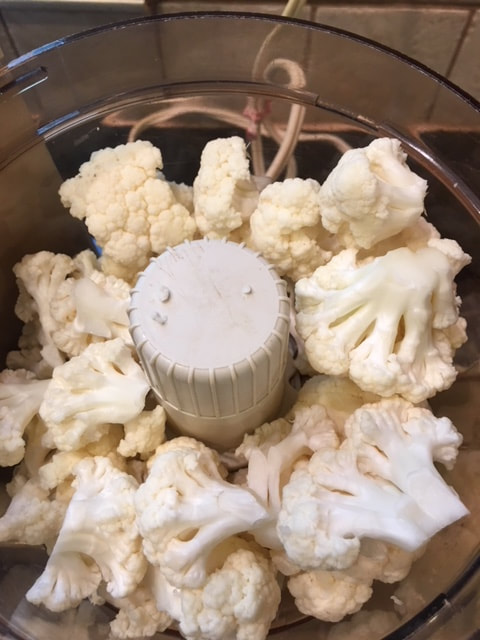
Cauliflower is a multitalented vegetable. I have found cauliflower heads in white, purple and orange, however, never in green. If you want to make it often, there are tons of ideas on how to cook it so you don’t get bored. If you don't have much time to prep it, just purchase it in stakes cuts or cauliflower rice and cook it in a flash. These are the many forms/ways that through the years I cooked it:
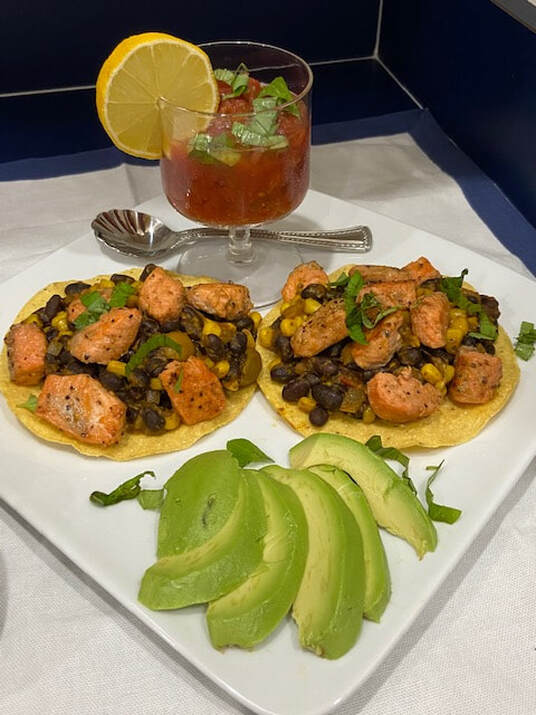
This is another way to use salmon during the week. It is simple, nutritious and way delicious. One thing though, a loaded Charra is more than enough food for one person when you side it with a salad and half an avocado, then bam, meal is served. Category: Entrée Approx. Prep and Cook Time: under 30 Minutes Approximate Cost: $11.68 or $2.92 per serving Difficulty Level: Easy Allergens, Other: Gluten Free Servings: 4 Charras Ingredients 2 salmon filets (skinned and cut in bite sizes) ($4.50) Fajita Marinade Seasoning (.10) 1 tbsp. Angie’s basting olive oil (.40) 4 Charras Tostadas (.75) 1 15 oz. can black beans, rinsed and drained (.99) 1 can of sweet corn, rinsed and drained (.99) ½ tbsp. achiote olive oil (in you don’t have achiote, use the oil with1 Sazón envelope) (.35) 1 med. size onion (.30) 2 large cloves of garlic (.10) 2 tbsp. salad olives, drained (15) 1 frozen sofrito cube (contains chopped cilantro, cilantro, pepper, rosemary, onion, garlic etc.) (.50) 1 avocado, sliced ($1.25) 1 c. chopped Cilantro (.30) 1 c. fresh salsa ($1.00) Directions Clean and season the salmon filet and cut in bite size. Add 1 tbsp. basting oil, 1 tbsp. Fajita Marinade Seasoning. Refrigerate. Prepare all the other ingredients, drain, rinse, etc.… Next, in a skillet at med-high heat, sauté the salmon bites until light golden brown. Remove set aside. In the same skillet, with 1 tbsp. of achiote olive oil, sauté the onion and chopped cloves of garlic. Then add black beans, sweet corn, salad olives, and frozen sofrito cube. Stir until the cube melts and the mixture comes together. To plate, bring the salsa out of the fridge, slice the avocados and assemble the tostadas as I did in my slide presentation and sprinkle with chopped cilantro. If you want, you could accompany this meal with a scoop of yellow rice, although I don’t think it is necessary, smile. Enjoy! OK friends, this is not the easiest dessert to make. Why? There are too many variables and factors to consider in order to get them right. If the weather is humid, don’t make them. If you over beat or under beat, you are dead. If you take them out of the oven before time or after time, super bad. Did they develop feet? Awesome. I can go on and on with this finicky and yet amazingly delicious, sophisticated and fancy cookie. I’ll stop. I researched tons of on-line recipes to finally come up with one that I felt comfortable. After all, this was my first time making them. Therefore, I warn you now, this recipe will be long so that I can help you to avoid flaws! Category: Dessert Approx. Prep and Cook Time: At least one hour Approximate Cost: $6.90 Difficulty Level: Advanced Allergens, Other: Gluten Free Servings: 24 Macarons (some of my cookies were uneven and not pretty, so I ate them) INGREDIENTS for the macaron: 1 c. almond flour ($2.67) (1 bag cost approx. $8.00) 2 c. powdered sugar (.60) 3 egg whites at room temperature (.48) ¼ tsp. cream of tartar (.05) ¼ c. white sugar (.25) Pinch of salt (.05) Food Coloring (.05) DIRECTIONS for the macaron: Sift the almond flour and powdered sugar and discard anything left in the sifter. It doesn’t matter that the almond flour said its extra fine, DO SIFT IT anyway, since you want to get a very fine powdery mix. Set aside. In a non-reactive bowl, beat the egg whites until foamy. Then add the salt, cream of tartar and white sugar and beat for about 10 minutes. This is critical: Beat until the mixture form straight peaks that stand when you lift the beaters or paddles. At that point, add the food coloring and it is recommended that we use gel. Now is the moment of truth, you will be folding the almond and sugar mixture into the egg whites mix and FOLD for about 60 to 75 times. After this you are ready to transfer the batter into a pastry bag. Every recipe I read recommends to use a ½ inch round tip. At this point PREHEAT THE OVER AT 300 DEGREES. While you pipe the cookies. In a baking sheet with parchment paper or silpat, pipe about 1” round cookies. IMPORTANT: ONCE YOUR BAKING SHEET IS FULL OF THE PIPED COOKIES, TAP THE SHEET HARD SEVERAL TIMES AGAINST YOUR COUNTER TOP, TO GET RID OF ANY BUBLES DEVELOPED WHILE PIPING THEM. It will also prevent cracks at the top of the cookies. Allow the baking sheets to stand in the kitchen for about 45 minutes to dry out the tops and better yet, this process will allow the cookies to develop the ever famous FEET. Bake them for about 20 minutes. ONE BAKING SHEET AT A TIME. Do not under bake or over bake them. While they bake, prepare the buttercream of the filling of your choice. Ingredients for the chocolate buttercream ½ c. Unsalted butter at room temperature ($1.00) 1 ½ c. Powdered sugar (.65) ¼ c. unsweetened cocoa powder (.40) 1 + tbsp. Evaporated milk (add more as needed for a smooth batter) (.20) ½ tsp. vanilla (.50) Directions for the chocolate buttercream
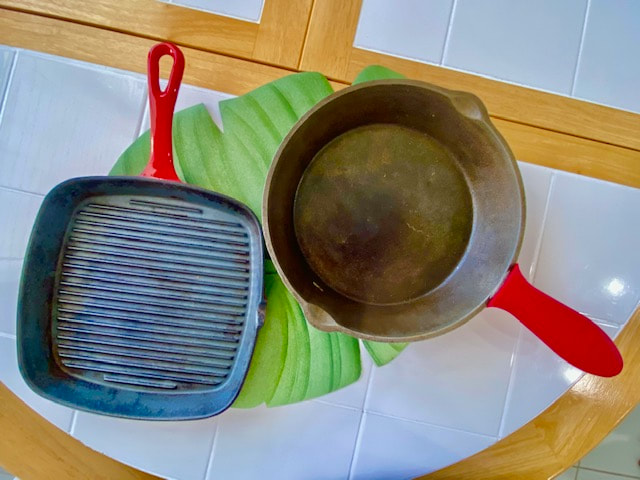
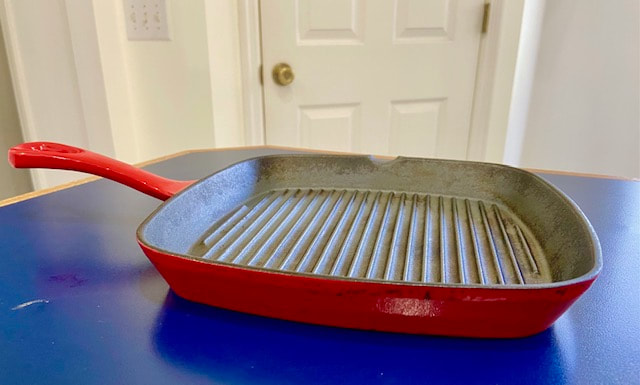
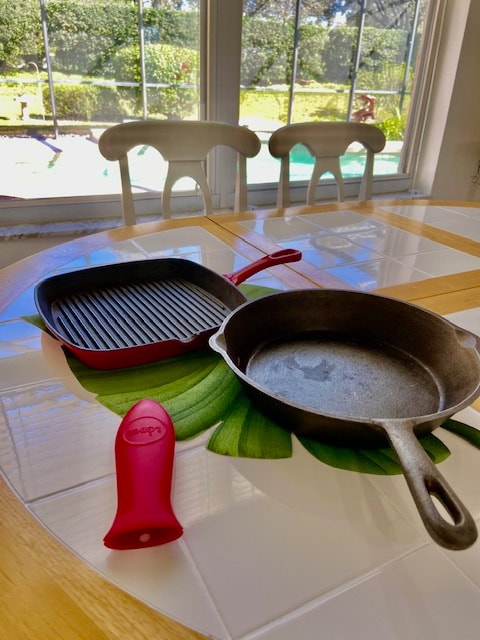
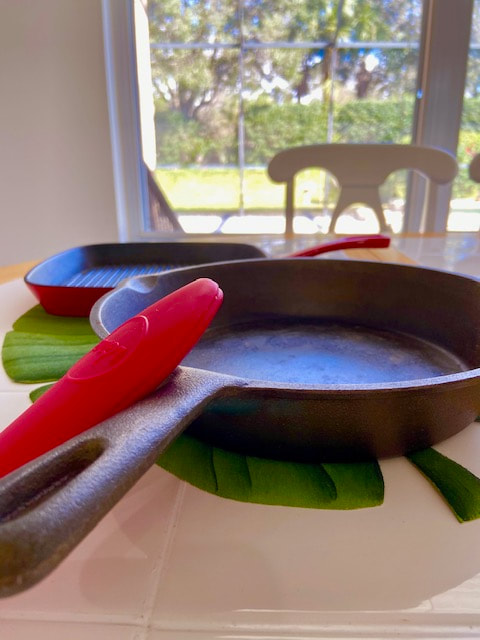
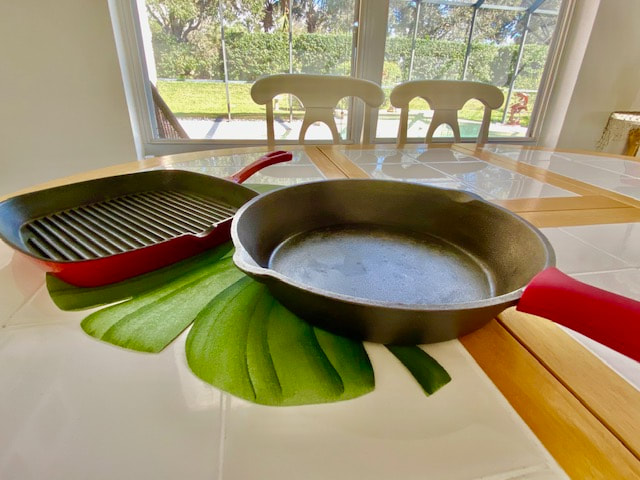
Few years ago while I was visiting my sweet daughter Dona, she introduced me to cast iron skillets. She inherited hers from her Nana and because of that, she cherishes it with all her heart. She also told me that this type of skillet releases some iron into the meals you cook in it, and that’s healthy stuff, therefore, you are getting a mineral that our bodies need to make hemoglobin as well, smile.
In spite of the fact that I am way older than her, I never owned a cast iron skillet before. Therefore, shortly after she introduced me to this marvelous skillets, I went to get my own for the very first time. As you can see, my photos show that I have been cooking in the skillets. Also, through the years I bought more than one. However, these skillets are not like your regular cooking skillets, they require special care and today, I would like to share with you some of the do’s and don’ about them to enjoy cooking in them and to keep in prime shape so that one day we all can pass them on to our grandchildren. Smile. These are the DO 3-Basic Steps: Keep them clean, keep them dry and last but not least, keep them oiled. CLEAN: As soon as you finish cooking and the cast iron skillet is totally cool, clean it with soapy water. If there is food stick to it, simply scrub it with a plastic sponge or a brush type of pad so you do not scratch it. DRY: Once you clean your skillet in the sink, dry it thoroughly with either paper towel or cloth. This is so important because any moisture left in the iron skillet will encourage and will develop the old mighty nasty rust. If at all possible, place it in the burner briefly until you feel it is warm. That will ensure the skillet is totally dry. OILED: This is so critical to keep the iron skillet functioning as it was intended, to cook nice meals on it. Is so simple. First, get about ½ tsp. of vegetable oil in the skillet. Then heat it just briefly on the stove until it is somewhat hot. When cooking in this type of skillet, always begin to heat it on low. Then move it on to medium heat and finally to high. Also:
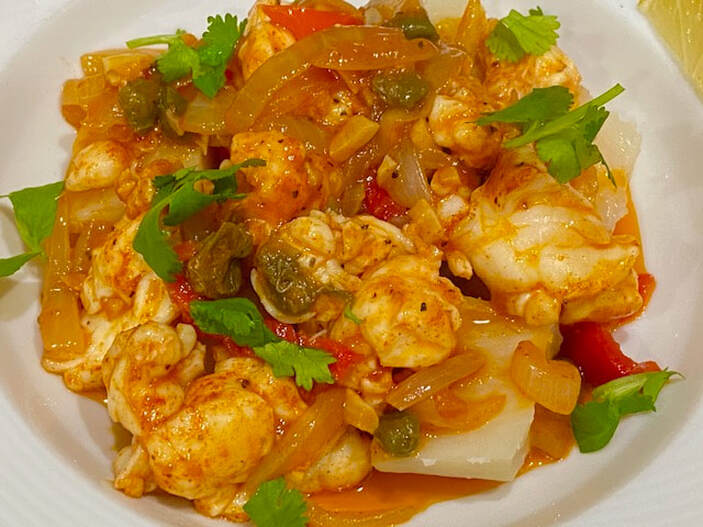
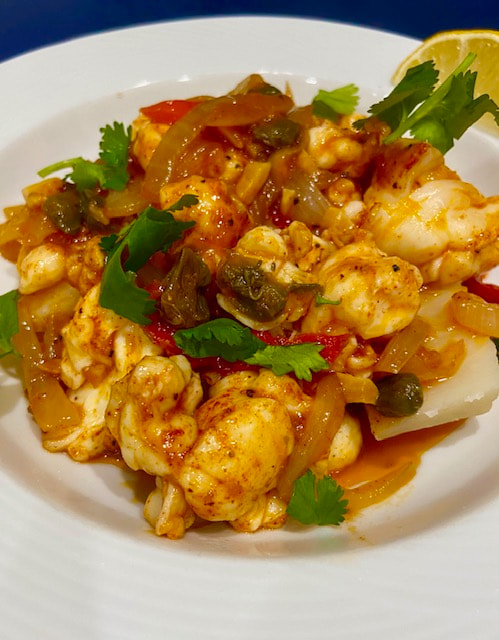
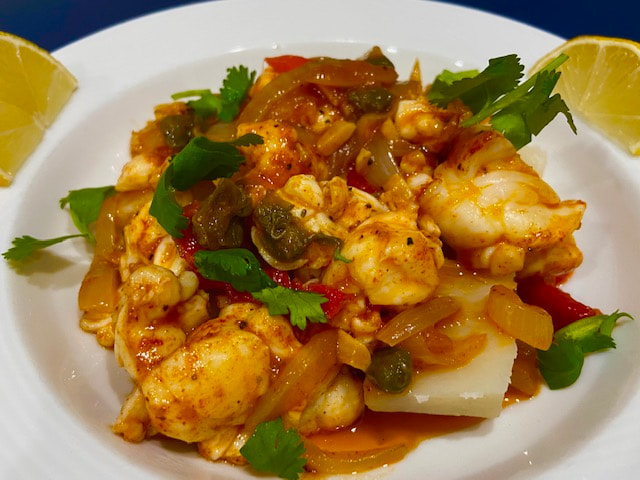
This is a dish that I used to eat back home a lot. There were two restaurants in Ponce that made the best of the best Langosta al Mojo. I think that I remember the names; La Cuevita and Lydia’s. Of course, I had to taste the dish time and time again, to identify the ingredients they used to make it, smile, it was a well kept secret. Through the years, however, I came up with my own recipe to mimic theirs because I simply love their light and secret Mojo sauce. Now I have my own and it's not secret but super delicious!
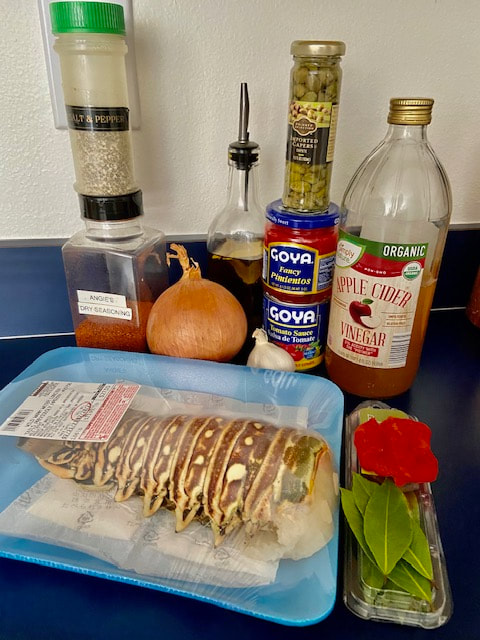
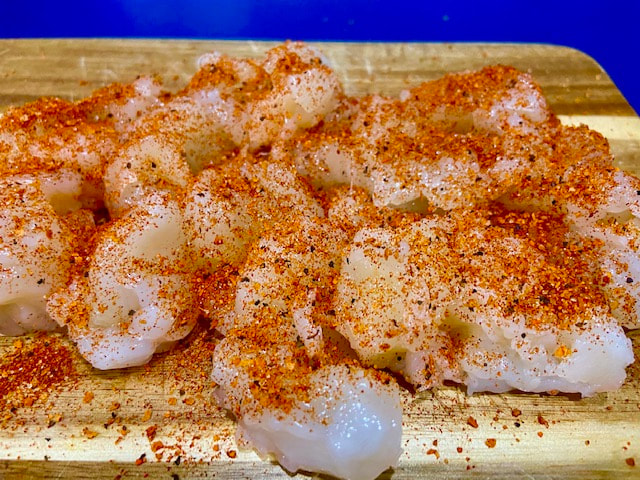
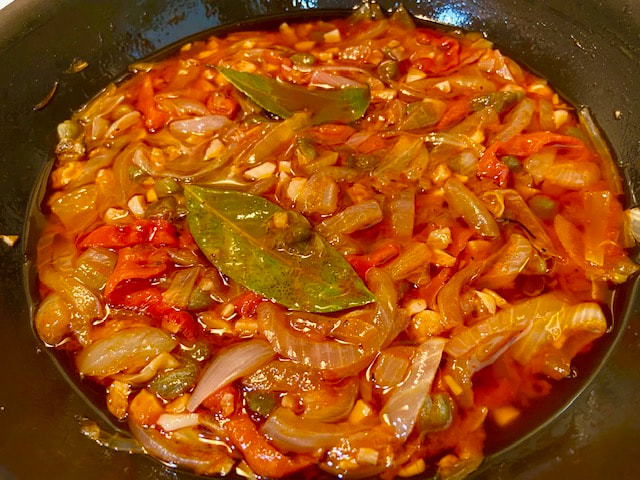
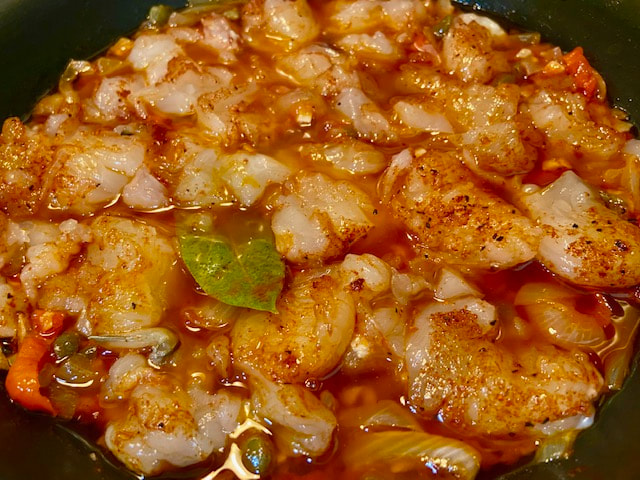
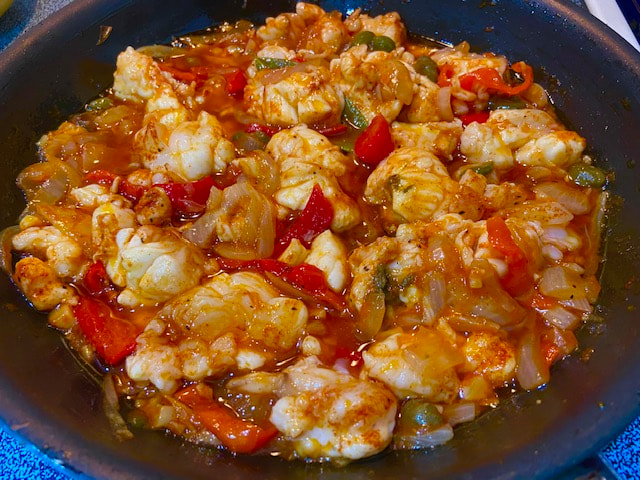
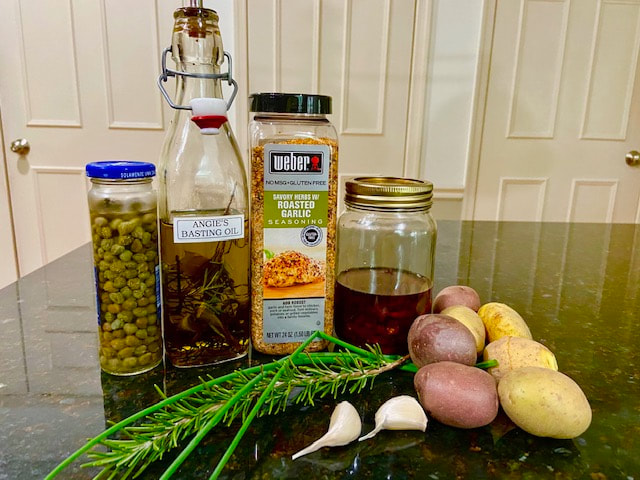
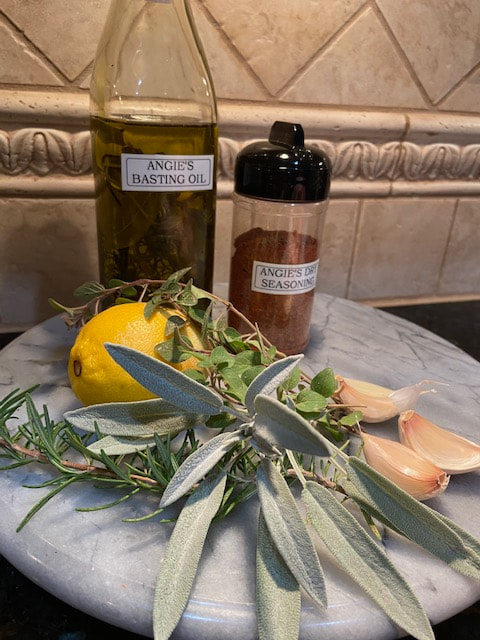
Category: Entrée Approx. Prep and Cook Time: 1 hour Approximate Cost: $32.84 or $10.95 per serving Difficulty Level: Advanced Allergens, Other: Gluten Free Servings: 3+ Ingredients to season the lobster 1 lobster tails ($27.99/lb.) 1 tbsp. Angie’s dry seasoning (.20) 1 tbsp. Angie’s basting olive oil (.50) Ingredients for the Mojo Sauce ½ cup Angie’s basting olive oil (for the lobster Mojo Sauce and season the lobster (.70) 10 large cloves of garlic (.35) 1 large onion sliced (.50) 1 red ajicito - cachucha or ½ bell pepper sliced (.50) ¼ cup of fresh Cuban oregano and/or cilantro, chopped (use some to garnish) (.30) 2 tbsp. capers rinsed and drained (.25) 1 tbsp. Angie’s dry seasoning (.20) 2 tbsp. Goya tomato sauce (because I don't like a thick red sauce) (. 25) ½ pimento pepper, sliced (.20) 3 bay leaves (.15) 1 tbsp. apple cider vinegar (.10) 2 lemons (to drizzle the juice over the final dishes, garnish and to add early on as seasoning) (.65) Salt and pepper to taste to adjust season at the end if needed. Directions If you didn’t prepare the lobster yesterday, then clean the tail with a wet paper towel. Carefully cut it in half either with your kitchen shears or a butcher knife. (Keep the shell to garnish or for stock.) Carefully, remove all the meat from the shell and also, the rubbery skin, it is very tough. (Use it though to make lobster stock, see my hack, from yesterday. Season the lobster with the aforementioned ingredients, refrigerate until time to use. In a skillet add some of the ½ c. of the olive oil to sauté the garlic, onion, sliced red pepper, and some of the Cuban oregano or cilantro. When the garlic/onions mix is translucent and light golden, add what’s left of your ½ cup olive oil for the lobster Moho Sauce, stir. Add the bay leaves, tomato sauce, capers, my dry seasoning, sliced pimento pepper, apple cider vinegar, juice of 1 lemon, salt and pepper to taste to adjust season at the end if needed. Finally, add the lobster meat. Cook for under 3-4 minutes until the lobster begins to turn white, then turn off the heat and remove from the burner immediately. You are now ready to plate and once done, squeeze lemon juice over the final dishes. ALSO: you can serve this lobster as is with a side or yellow rice, or pasta or do what I did. I purchased a bag of frozen Yucca, cooked it according to the bag directions, drained it and placed it in the bottom of the plate. Then added the lobster over it and sprinkle with chopped cilantro. I know that we don’t make lobster meals weekly. However, when the opportunity knocks on the door, we must be prepared to handle the work and rise to the occasion! Smile.
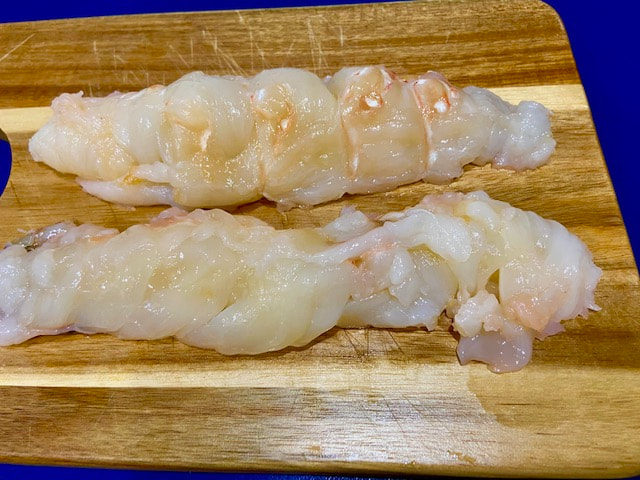
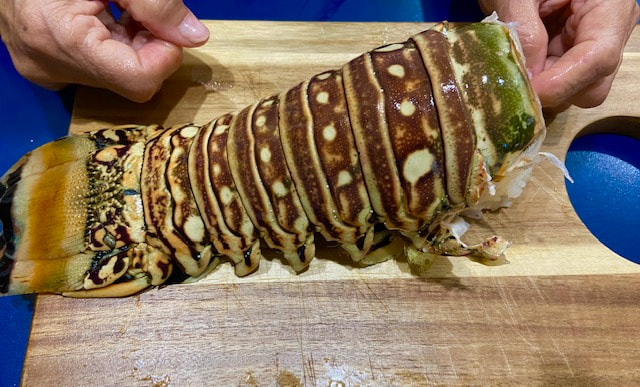
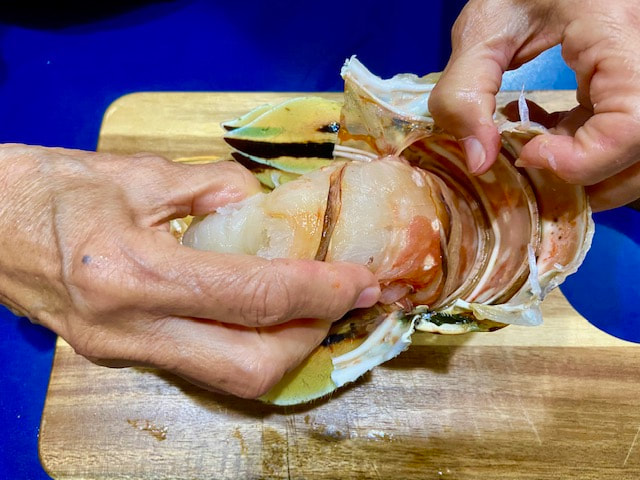
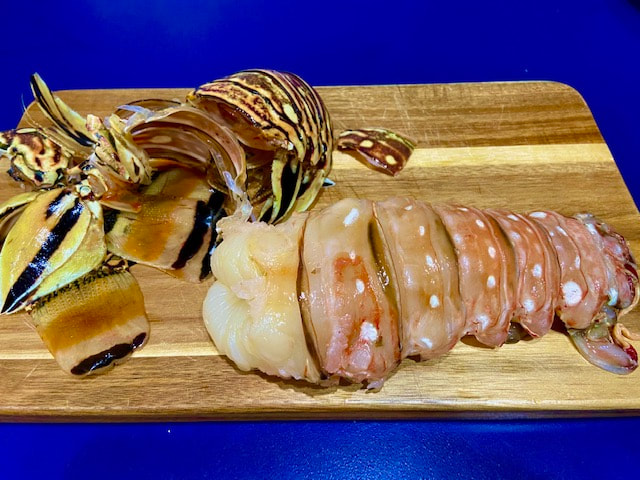
MY RECIPE FOR TOMORROW; Lobster al Mojo. Stay tuned! Category: HACK Approx. Prep and Cook Time: 15 Minutes Approximate Cost: ($25.99) Difficulty Level: Intermediate Allergens, Other: Gluten Free Servings: 3+ Ingredients 1 lb. lobster tail ($25.99) Directions Clean the tail with a wet paper towel. WARNING: Carefully cut the tail as needed with your kitchen shears or a butcher knife. Keep the shells for garnishing. Carefully, remove all the meat from the shell and also, the rubbery skin, it is very tough. (Use it to make lobster stock, see my hack below.) Now you are ready to work on your lobster recipe; you can keep the tail intact, just cut it on top to fill it with a garlic aioli sauce or cut it in half to broil it or BBQ it or finally, cut in bite pieces to make my recipe for tomorrow; Lobster al Mojo. Stay tuned! HACK: To make lobster stock: In a saucepan with 1 tbsp. of olive oil sauté the tough lobster skin that you remove from the lobster, the lobster shells, 1 chopped onion, 1 chopped garlic head and chopped cilantro or any other herb that you may have in your garden or fridge Add 5 cups of water carefully, your favorite spices, simmer for about 15 minutes, wait until it cools down and strain. Keep it in the freezer until next time when you are making seafood dish and need to use seafood stock. The pandemic quarantine have "encouraged" or "forced" people to cook at home. Cooking is so necessary to our survival. If we do not cook, we must either eat out, have someone to cook for us or starve. (Please read this post to the end for good ideas)
Cooking is such a pleasant and enjoyable activity. It involves most of our senses; touch, eyes, smell, taste and at times hearing the timer or the sizzle. The following are some of my hacks and hopefully, they may help you as they have helped me through the years. Hack #1: If you are roasting meat and do not have a roasting rack, try placing a layer of chopped veggies like carrots and celery, etc. at the bottom of the baking pan. Drizzle olive oil over it generously and place the meat on top. That will keep the meat above the bottom of the pan and won’t burn it. Hack #2: So, you are making pasta right? Then please do not add oil to the boiling water. Unfortunately, the oil will prevent whichever sauce you are making from sticking to the pasta. I used to do that years ago but thanks to some TV Italian chefs, I learned that it was a no, no. Hack #3: Always, and I mean always, please taste the food while you are cooking. There is nothing worse than a tasteless meal, or an overly salted steak. Hack #4: Please plan your weekly meals menu, then, put together your groceries list. This will help you to purchase all the ingredients that you need for the week, prevent wondering through the isles for ideas of what you will cook, help you to just go grocery shopping one day a week, especially, to keep you safe during this terrible pandemic and last but not least, it will save you money, since you are buying what you need for that time period. And please, go grocery shopping on a full stomach, smile. Hack #5: Purchase at least one rotisserie chicken a week. If you have a household of 2. However, if you have a household of 5 or under, the purchase 2. Why? Read: Rotisserie #1: You will have the main ingredient of one day already prepared. Use the 2 breasts with a veggie like steamed broccoli and add a starch like couscous. Rotisserie #2: Save the chicken drums to make arroz con pollo (chicken with rice) for two people. Then add a salad and your meal is complete. Rotisserie #3: Remove the skin, the bones and shred the rest of the chicken for other dishes. (Then save all the bones and some of the toasty dark brown skin for stock) Refrigerate. Rotisserie #4: With the shredded chicken you can make enchiladas, chicken chili, or chicken salad for two people any day of the week. To make chicken stock with the bones and skin, saute them in a saucepan with a bit of olive oil, add carrots, onion, garlic, celery, bay leaves, cilantro, peppers, etc., then add enough water to fill the saucepan about half way. Reduce the heat and simmer for about 20 minutes. Let it cool and strain to get a good homemade stock. Rotisserie #5: Use your chicken stock to make chicken with rice and drums, or a lentil soup with some of that shredded chicken, chopped carrots and potatoes or add to any stew. Rotisserie #6: If you still have any shredded chicken leftover, use it to make an omelet mixed with tater tots or chopped potatoes. |
ABOUT THE AuthorI am a blogger, a photographer, a jewelry designer, a gourmet cook, and a recipe book writer. I am also a flea market flipper, an avid gardener, an interior/ outdoors designer, an avid golfer and traveler. Categories |




 RSS Feed